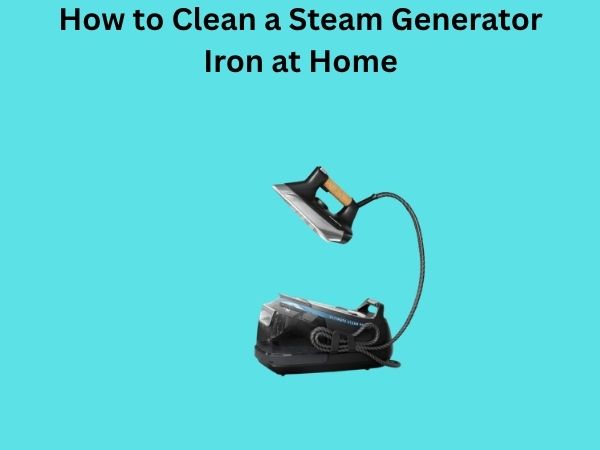
The Ultimate Guide: How to Clean a Steam Generator Iron at Home
I’ve been there—you pull out your trusty steam generator iron, excited to tackle that mountain of wrinkled clothes, only to discover it’s not gliding smoothly across fabrics anymore. The steam comes out weak, and you’re left wondering what went wrong. The truth? Your steam generator iron needs some TLC, and I’m here to show you exactly how to give it that care.
A steam generator iron is an investment in your home, and like any investment, it requires maintenance. Think of it like maintaining your car—regular tune-ups prevent major breakdowns. In this comprehensive guide, I’ll walk you through everything you need to know about cleaning your steam generator iron, from the daily basics to deep cleaning methods that’ll have it performing like new again.
Why Cleaning Your Steam Generator Iron Matters More Than You Think
You might be wondering: why should I spend time cleaning my iron? Well, here’s the thing—mineral deposits, lint, and residue buildup are silent performance killers. They clog the steam vents, reduce heat distribution, and can actually damage your fabrics over time. I’ve seen people replace perfectly good irons when they simply needed a good cleaning.
Regular cleaning not only extends the lifespan of your appliance but also ensures better results. Your clothes will come out crisper, wrinkles will disappear faster, and you’ll actually enjoy ironing (okay, maybe that’s a stretch, but you’ll definitely notice the difference).
Understanding Steam Generator Iron Components
Before we dive into cleaning, let’s talk about what we’re actually working with. A steam generator iron consists of several key parts: the water tank, the heating element, the steam chamber, the soleplate, and various internal tubes and vents. Each part plays a crucial role in how your iron performs, and each requires different cleaning approaches.
Daily Maintenance: The Foundation of Iron Care
Think of daily maintenance as brushing your teeth—it prevents major problems down the road. These simple steps take just a few minutes but make a world of difference.
Wiping the Soleplate After Each Use
This is non-negotiable. After you finish ironing, while the soleplate is still slightly warm (not hot), grab a soft, damp cloth and wipe it clean. You’re removing lint, fabric fibers, and any residue that’s accumulated during ironing. This prevents buildup that hardens and becomes difficult to remove later.
If you notice stubborn marks, use a cloth dampened with white vinegar. The acidity helps dissolve mineral deposits without damaging the soleplate’s non-stick coating.
Emptying the Water Tank Regularly
Here’s something many people overlook: stagnant water in your tank is a breeding ground for bacteria and mineral accumulation. If you’re not using your iron regularly, empty the tank completely. Even if you are using it, consider emptying it at least once a week if you’re ironing frequently.
I recommend using distilled water in your steam generator iron, but even distilled water can leave behind some minerals over time. That’s why regular emptying matters.
Monthly Deep Cleaning: Tackling Mineral Deposits
Once a month, your steam generator iron deserves a more thorough cleaning. This is where we address the mineral buildup that’s accumulated inside.
The Vinegar Flushing Method
This is my go-to method, and honestly, it’s ridiculously simple. Here’s what you’ll need:
- White vinegar (regular household vinegar works perfectly)
- Distilled water
- A container or bucket
- Paper towels or an old cloth
Start by unplugging your iron and letting it cool completely. Mix equal parts white vinegar and distilled water in your container. Remove the water tank from your steam generator iron and pour the vinegar solution into it. Now, plug in your iron and let it heat up normally.
Once it reaches temperature, hold the iron over your bucket or sink and press the steam button repeatedly for about 10 seconds. Release, wait a few seconds, then press again. You’ll notice the solution flowing out, often with visible mineral deposits and debris. Continue this process until you’ve used about half the vinegar solution.
Now here’s the important part: refill your tank with pure distilled water and repeat the steam-pressing process 5-6 times. This flushes out any remaining vinegar residue—you don’t want your iron smelling or tasting like vinegar when you use it next time.
Cleaning the Soleplate Thoroughly
While your iron is still warm (after the vinegar flush), tackle the soleplate. Mix a paste of baking soda and water—about three parts baking soda to one part water. Apply this paste to any discolored areas or stubborn spots on the soleplate.
Use a soft cloth or soft-bristled brush to gently scrub in circular motions. The mild abrasiveness of baking soda removes deposits without scratching the surface. Wipe clean with a damp cloth, and your soleplate should shine.
Addressing Common Steam Generator Iron Issues
Weak Steam Output: Causes and Solutions
If your iron used to produce impressive steam but now it’s barely a whisper, mineral buildup is likely the culprit. The vinegar flushing method I described above usually fixes this. However, if it persists, you might have a more serious blockage.
In that case, consider using a descaling solution specifically designed for steam appliances. These are stronger than vinegar and can dissolve stubborn deposits. Follow the manufacturer’s instructions carefully, and always flush thoroughly with distilled water afterward.
Brown Water or Staining on Clothes
This one’s frustrating because it means your iron is leaving marks on your fabrics. This usually indicates rust or mineral buildup inside the steam chamber. The good news? It’s fixable.
Run multiple cycles of the vinegar flush method, and ensure you’re using distilled water exclusively. If the problem persists, it might be time to consider a professional descaling service or, in severe cases, replacement.
Sputtering or Spitting
When your iron spits water instead of producing smooth steam, it’s usually because water droplets are reaching the heating element instead of being properly vaporized. This often happens when the steam chamber is partially clogged. Again, the vinegar flush method should resolve this issue.
The Deep Clean: When Your Iron Needs Serious Attention
When Should You Do a Deep Clean?
I recommend a deep clean every three months, or more frequently if you live in an area with hard water. Signs your iron needs this level of cleaning include reduced steam output, visible discoloration on the soleplate, or unusual noises during operation.
Step-by-Step Deep Cleaning Process
Begin by unplugging your iron and allowing it to cool for at least 30 minutes. If your steam generator iron has a removable tank, remove it. If not, you’ll be working with it attached.
Fill the tank with a fifty-fifty mixture of white vinegar and distilled water. Plug in the iron and let it heat to maximum temperature. This usually takes 5-10 minutes, depending on your model.
Once heated, hold the iron horizontally over a sink or bucket with the steam outlet facing down. Press the steam button and hold it for 15 seconds. Release, wait 20 seconds, then repeat. Do this 8-10 times total. You’re forcing the vinegar solution through all the internal pathways, dissolving mineral deposits as it goes.
After the vinegar cycle, empty any remaining vinegar solution and refill the tank completely with distilled water. Repeat the steam-pressing process another 8-10 times. Then do it one more time with a fresh tank of distilled water. You’re being thorough here—any vinegar smell remaining will fade, but it’s better to be cautious.
While the iron is still warm, grab your baking soda paste again and give the soleplate another thorough scrub. Pay special attention to the steam vents—they often accumulate deposits. Use a soft toothbrush or small brush to get into those tiny openings.
Choosing the Right Water: A Surprising Impact on Cleaning
Here’s something that changed my life with steam appliances: the water you use matters enormously. Tap water contains minerals that accumulate over time, creating the very problems we’re trying to prevent. Distilled water, on the other hand, is mineral-free and won’t contribute to buildup.
If you can’t access distilled water, the next best option is demineralized water. In a pinch, filtered water is better than tap water, but it’s not ideal. The small investment in distilled water will pay dividends in the longevity and performance of your steam generator iron.
Prevention Strategies: Stop Problems Before They Start
Storage Tips for Long-Term Performance
How you store your iron matters more than most people realize. Always ensure it’s completely cool before storing. Keep it in a dry location—moisture in storage areas can lead to internal corrosion.
Empty the water tank completely before storing your iron for extended periods. I learned this the hard way when I discovered stagnant water had created a brownish residue in my tank after a month of non-use.
Creating Your Maintenance Schedule
Make a simple schedule: wipe the soleplate daily, empty the tank weekly, do a vinegar flush monthly, and perform a deep clean quarterly. Write it down or set phone reminders if that helps. Consistency is where the magic happens.
When to Call a Professional or Replace Your Iron
Sometimes, despite our best efforts, an iron reaches the end of its life. If you’ve tried the cleaning methods I’ve described and your iron still produces brown water, has weak steam, or shows signs of internal corrosion, it might be time to move on.
Professional descaling services exist, but they’re often expensive—sometimes half the cost of a new quality steam generator iron. It’s worth doing some math before committing to professional service.
Conclusion
Cleaning your steam generator iron doesn’t have to be complicated or time-consuming. What matters is consistency—those daily five-minute wipe-downs prevent the mineral buildup that causes real problems. A monthly vinegar flush keeps everything running smoothly, and a quarterly deep clean ensures your iron performs at its best for years to come.
I’ve learned that taking care of your appliances, whether it’s a steam generator iron or anything else, is really just about understanding how they work and respecting their needs. Your iron works hard for you, making your clothes look sharp and professional. Repay that effort with regular maintenance, and it’ll serve you reliably for many years. The time you invest now in cleaning and prevention will save you money, frustration, and the hassle of replacing a perfectly functional appliance.
Frequently Asked Questions
How often should I clean the steam vents on my steam generator iron?
I recommend checking and cleaning the steam vents monthly during your regular maintenance routine. If you notice reduced steam output or spitting, though, don’t wait—do a vinegar flush immediately. The frequency really depends on your water quality; people with harder water might need to clean more often, while those with softer water can go longer between cleanings.
Can I use apple cider vinegar instead of white vinegar for cleaning?
While apple cider vinegar does have acidic properties, I’d stick with white vinegar for this task. White vinegar is more predictable, doesn’t have the sugars that apple cider vinegar contains (which could leave residue), and won’t add any unwanted smell or color to your iron. It’s the safer, more reliable choice for appliance maintenance.
Is it safe to use commercial descaling products in my steam generator iron?
Yes, commercial descaling products designed for steam irons are generally safe if you follow the manufacturer’s instructions carefully. However, natural vinegar is just as effective for most situations and costs pennies. Save the commercial products for severe buildup that vinegar doesn’t address.
What should I do if my iron starts leaking water?
A leaking iron usually indicates one of three problems: overfilled tank, damaged seals, or a cracked internal component. First, ensure you’re not overfilling the tank—there’s usually a max line. If it’s not that, the seals might be deteriorating, which requires professional repair. If the housing itself is cracked, sadly, replacement is often the best option.
Can mineral deposits damage the soleplate permanently?
Mineral deposits themselves won’t permanently damage the soleplate, but the corrosion that develops underneath them can. This is why prevention and regular cleaning are so important. If you address buildup early, your soleplate will remain in excellent condition. If you let deposits accumulate for years, they can create pitting that’s difficult to remove.
“`