How Do I Clean a Steam Generator Iron? Complete Guide
If you’re like most people, you probably don’t think much about cleaning your steam generator iron until something goes wrong. Maybe your clothes aren’t getting that crisp finish anymore, or you notice brown spots appearing on your favorite shirt. That’s when the panic sets in, and you wonder if your trusty appliance is about to give up the ghost.
Here’s the good news: cleaning a steam generator iron isn’t rocket science. With the right approach and a little elbow grease, you can keep your iron performing like new for years to come. In this comprehensive guide, I’m going to walk you through everything you need to know about maintaining and cleaning your steam generator iron, so you can get back to crisp, professional-looking clothes in no time.
Understanding Your Steam Generator Iron
Before we dive into the cleaning process, let’s talk about what makes a steam generator iron different from a regular iron. Think of it like comparing a sports car to a standard sedan—both get you where you need to go, but one does it with significantly more power and efficiency.
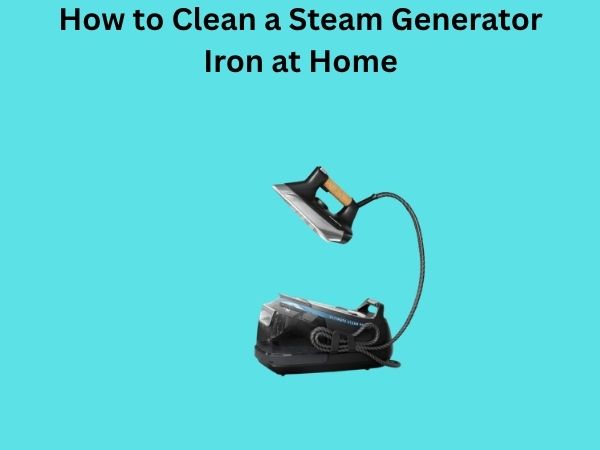
A steam generator iron works by heating water in a separate boiler and then delivering steam through a hose to the iron plate. This means you get consistent, powerful steam output that penetrates fabric more effectively than traditional irons. The downside? All that power and constant water flow mean mineral buildup can happen faster than you’d expect.
Why Cleaning Your Steam Generator Iron Matters
The Problem With Mineral Buildup
Water contains minerals—calcium, magnesium, and lime are the usual culprits. When you heat water repeatedly, these minerals don’t disappear; they accumulate. Over time, this buildup creates a thick, crusty layer inside your steam generator iron’s internal pipes and heating elements. It’s similar to how mineral deposits build up in your shower head or kettle.
This mineral accumulation causes several problems that directly impact your ironing experience:
- Reduced steam output that makes ironing harder and takes longer
- Brown spots and stains appearing on clean clothes
- Sputtering or inconsistent steam flow
- Unpleasant odors when the iron heats up
- Decreased lifespan of your appliance
How Regular Cleaning Extends Your Iron’s Life
Regular maintenance is like brushing your teeth—it prevents major problems from developing. When you clean your steam generator iron consistently, you’re preventing mineral deposits from hardening and becoming difficult or impossible to remove. You’re also protecting the internal components from corrosion and damage.
What You’ll Need to Get Started
Gathering the right supplies before you begin makes the cleaning process much smoother. Here’s what I recommend having on hand:
- White vinegar (the cleaning superstar for mineral deposits)
- Distilled water (to rinse and refill your iron)
- A bowl or bucket large enough to hold your iron’s base
- A soft brush or old toothbrush
- Soft cloths or microfiber towels
- A small funnel (optional but helpful)
- An old cotton cloth for testing steam
- Baking soda for stubborn buildup
Avoid using commercial descaling solutions unless your manufacturer specifically recommends them—vinegar is usually just as effective and much safer for your iron’s internal components.
The Step-by-Step Cleaning Process
Preparation: Safety First
Before you start any cleaning work, unplug your steam generator iron from the electrical outlet. I know this seems obvious, but you’d be surprised how many people skip this step in their eagerness to get started. Wait at least thirty minutes for the iron to cool completely—touching a hot iron plate or boiler is a one-way ticket to a painful burn.
Once it’s cool, empty any remaining water from both the boiler and the iron itself. Some models have drainage plugs specifically for this purpose, so check your manual if you’re unsure where they’re located.
Cleaning the Iron Plate Surface
The iron plate is what actually makes contact with your clothes, so keeping it clean is essential. Even if the inside is spotless, a dirty plate will ruin your ironing results.
For daily maintenance, wipe the cold iron plate with a damp cloth after each use. This removes starch, lint, and fabric residue. For more stubborn deposits, you can use a specialized iron plate cleaner or make your own paste with baking soda and water.
Apply the paste to the plate and gently scrub with a soft cloth. The key word here is “gently”—you’re not trying to sandblast the plate, just remove buildup. Once you’re satisfied, wipe it clean with a damp cloth and dry it thoroughly.
Descaling the Internal System
This is where the real cleaning happens. The internal boiler and pipes need regular descaling to prevent mineral accumulation. Here’s how to do it properly:
Fill a bowl with white vinegar—enough to submerge the iron’s base unit. Some people prefer diluting the vinegar fifty-fifty with water for gentler action, while others use full-strength vinegar for heavy buildup. I’d suggest starting with the diluted version and upgrading to full-strength only if needed.
Submerge the iron base in the vinegar solution and let it soak for about thirty minutes. During this time, the vinegar works its magic, breaking down mineral deposits and loosening them from the internal surfaces. You might notice the vinegar changing color—that’s the minerals dissolving, which is exactly what you want.
Flushing the System
After the soak, drain the vinegar solution and rinse the base thoroughly with distilled water. This step is crucial because you need to remove all the loosened mineral particles and vinegar residue before using the iron again.
Here’s a helpful trick: fill the boiler with distilled water and let the iron heat up. Once it reaches temperature, press the steam button over a sink or basin to flush out any remaining debris. You might see some brown water or particles coming out—that’s perfectly normal and actually a good sign that the cleaning is working.
Repeat this flushing process two or three times until the water running out is completely clear. This ensures that no mineral particles or vinegar smell remain in the system.
Tackling Stubborn Mineral Deposits
When Vinegar Alone Isn’t Enough
Sometimes you’ll encounter buildup so stubborn that a simple vinegar soak won’t cut it. Maybe your iron has gone months without cleaning, or you live in an area with particularly hard water. In these cases, you need to escalate your approach.
Create a stronger cleaning solution by mixing equal parts white vinegar and distilled water, then add a tablespoon of baking soda. This creates a fizzing, bubbling action that helps break down hardened mineral deposits more effectively than vinegar alone.
Submerge the iron base in this solution for several hours or even overnight. The extended soak time, combined with the chemical action of the baking soda, can work wonders on even the most stubborn buildup.
Manual Scrubbing Technique
If soaking alone doesn’t completely eliminate the deposits, use a soft brush to gently scrub away the remaining buildup. An old toothbrush works perfectly for this task. Focus on areas where you can actually see mineral deposits, but avoid aggressive scrubbing that might damage internal components.
The combination of chemical action from the vinegar and gentle mechanical scrubbing usually solves even persistent problems. After brushing, repeat the rinsing and flushing process multiple times to ensure all debris is removed.
Preventative Maintenance Strategies
Use Distilled Water Only
This is perhaps the single most important thing you can do to prevent mineral buildup. I can’t stress this enough—always, always use distilled water in your steam generator iron. Tap water contains minerals that regular water doesn’t remove, no matter how clean your tap water seems.
Think of distilled water as preventative medicine for your iron. Yes, it costs a bit more than tap water, but it’s a fraction of what you’d spend replacing the iron prematurely. Most distilled water costs less than a dollar per gallon, and a steam generator iron uses relatively little water.
Establish a Regular Cleaning Schedule
Don’t wait until something goes wrong to clean your iron. Instead, create a maintenance schedule based on how often you use your iron and how hard your water is.
- Heavy users in hard water areas: clean every two to four weeks
- Regular users in medium water areas: clean every six to eight weeks
- Occasional users in soft water areas: clean every two to three months
Mark your calendar or set a phone reminder. When that date comes around, dedicate twenty minutes to cleaning your iron. It’s a small investment of time that prevents much larger problems down the road.
Empty the Water Tank After Each Use
Leaving water sitting in your iron’s boiler between uses creates an ideal environment for mineral deposits to form and bacteria to grow. It only takes a minute to empty the tank completely, but it makes a huge difference in your iron’s longevity.
Some models have a drain valve at the bottom of the boiler, while others require you to carefully pour out the water. Check your manual to find the easiest way to accomplish this on your specific model.
Troubleshooting Common Steam Generator Problems
Brown Spots on Clothes
If you’re seeing brown stains on your freshly ironed clothes, mineral deposits are almost certainly the culprit. The mineral particles are being sprayed onto your fabric through the steam vents.
The solution is the descaling process I described earlier. Perform a thorough cleaning and multiple rinses to ensure all mineral particles are flushed out. In the future, use distilled water exclusively and maintain your regular cleaning schedule to prevent recurrence.
Weak Steam Output
When your iron is barely producing steam, mineral buildup is blocking the steam passages. It’s like trying to drink through a straw that’s partially clogged—the harder you suck, the less you get.
This is actually a sign that you need to clean your iron urgently. Follow the full descaling process I outlined earlier, paying special attention to flushing the system multiple times. You might also try running white vinegar through the steam vents directly to clear any blockages in the steam passages.
Unusual Odors
A funky smell coming from your iron when it heats up indicates bacterial growth in the stagnant water. This is another reason to empty your tank after each use.
To eliminate the odor, fill the boiler with a fifty-fifty mixture of white vinegar and distilled water. Heat the iron and let it sit for thirty minutes. Then run the steam function repeatedly while aimed into a sink or basin until the vinegar smell clears. Follow up with several flushes of distilled water to ensure no vinegar odor remains.
Cleaning Specific Components
The Steam Hose
The hose connecting your boiler to the iron head is another area where mineral buildup can accumulate. If you notice the steam output is weak coming through the hose, it might be partially blocked.
Disconnect the hose from both the boiler and the iron head. Hold it up to a light and look through it—if you can’t see light coming through, there’s blockage. Fill a bowl with white vinegar and submerge the hose for several hours. Then rinse it thoroughly with distilled water and reconnect it.
The Iron Head Assembly
The iron head has multiple steam vents where minerals can accumulate and cause blockages. A soft brush or old toothbrush works well for cleaning around these vents. If they’re badly clogged, soak the iron head in vinegar solution for thirty minutes to loosen the deposits, then brush them away gently.
Safety Tips and Warnings
Working with heated appliances and chemical solutions requires caution. Always remember these safety guidelines:
- Never attempt to clean your iron while it’s plugged in or still hot
- Don’t use vinegar that’s food-grade if you have a choice—white cleaning vinegar is safer
- Avoid harsh chemical cleaners that might damage internal seals and gaskets
- Never submerge the entire iron in water, only the base unit
- Ensure the iron is completely dry before plugging it back in
- Wear gloves if you have sensitive skin when handling vinegar
Following these precautions ensures that your cleaning process is both effective and safe for you and your appliance.
When to Call a Professional
Most cleaning can be handled at home, but sometimes you might encounter problems that require professional attention. Consider calling a repair service if:
- The iron won’t produce steam even after thorough cleaning
- You notice leaking water coming from internal seals
- Strange noises are coming from the boiler
- The heating element seems to be failing
- You accidentally damaged internal components while cleaning
A professional technician has specialized tools and expertise to handle problems that go beyond normal maintenance. It might cost fifty to a hundred dollars, but it’s often cheaper than buying a new iron.
Extending Your Iron’s Overall Lifespan
Storage Best Practices
How you store your steam generator iron between uses affects its longevity. Always allow the iron to cool completely before storing it. Store it upright on its heel rest in a dry location, never lying on its side or upside down. This prevents water from accumulating in areas where it shouldn’t be.
Keep your iron in a clean, dust-free environment. If you store it in a damp basement or humid garage, moisture can cause corrosion on metal parts and promote bacterial growth in the water tank.
Using Your Iron Correctly
Believe it or not, how you use your iron affects how long it lasts. Avoid pressing too hard on delicate fabrics, which can damage the sole plate over time. Let the steam do the work rather than relying on pressure.
Also, never leave your iron sitting unattended on fabric. Even though modern irons have automatic shutoff features, it’s still dangerous and can scorch or damage material. Always set your iron on its heel rest or in a completely horizontal position when paused.
Conclusion
Cleaning a steam generator iron might seem like a daunting task, but I hope this guide has shown you that it’s actually quite straightforward once you understand the process. The key to maintaining a perfectly functioning iron is consistency—regular maintenance prevents problems far more effectively than scrambling to fix things after they’ve already gone wrong.
Remember the three cornerstones of steam generator iron maintenance: use distilled water exclusively, establish a regular cleaning schedule based on your usage and water hardness, and don’t hesitate to perform a thorough descaling when you notice declining performance.
By following the steps and tips I’ve outlined, you’ll keep your steam generator iron working like new for many years to come. Your clothes will stay crisp and spotless, the steam will flow powerfully and consistently, and you’ll avoid the disappointment of having to replace a relatively new appliance prematurely. A little preventative care goes a long way—invest twenty minutes every few weeks in maintenance,