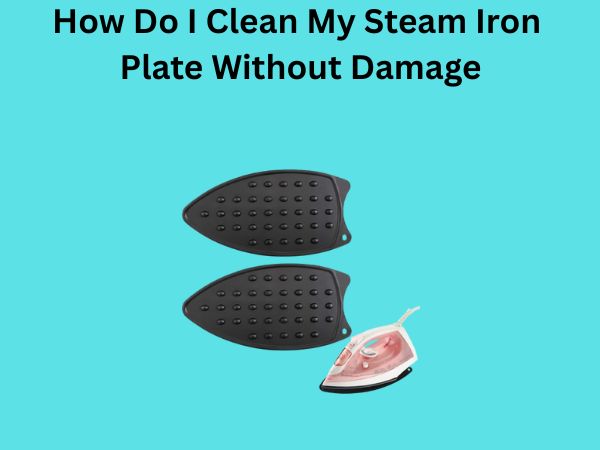
How to Clean Black and Decker Steam Iron: A Complete Guide
Let me be honest with you—your Black and Decker steam iron is one of those appliances that works hard behind the scenes. It’s sitting in your laundry room, pressing your clothes day after day, but do you ever think about what’s happening inside that soleplate? Probably not. And that’s exactly why your iron might be losing its steam power or leaving mysterious brown stains on your favorite shirts.
The truth is, cleaning your Black and Decker steam iron isn’t just about keeping it looking nice. It’s about maintaining its performance, extending its lifespan, and ensuring those crisp, wrinkle-free results you’re paying for. So let’s dive into everything you need to know about keeping your iron in top shape.
Understanding Why Your Iron Needs Regular Cleaning
Think of your iron’s soleplate like the teeth in your mouth. If you don’t brush regularly, problems build up. When water sits in your iron’s reservoir and runs through the steam vents repeatedly, mineral deposits accumulate. Hard water is particularly sneaky—those invisible minerals leave residue that clogs steam holes and reduces performance.
Beyond mineral buildup, your soleplate collects lint, fabric fibers, and even burnt fabric particles over time. This gunk creates friction, which means your iron glides less smoothly and potentially transfers stains to your clean clothes. Nobody wants that.
Signs Your Black and Decker Iron Desperately Needs Cleaning
Weak or No Steam Output
If you’re pressing your clothes and barely getting a whisper of steam, that’s your first red flag. Mineral deposits are blocking those tiny steam vents, preventing water from converting to steam properly.
Brown Water or Stains on Clothes
Seeing brown spots appearing on white fabric? That’s oxidized minerals and residue being sprayed onto your clothes. It’s basically your iron crying for help.
Sluggish Gliding Action
When your iron feels like it’s dragging across fabric instead of gliding smoothly, the soleplate probably has accumulated buildup that’s creating resistance.
Strange Noises or Hissing Sounds
Unusual sounds coming from your iron typically indicate mineral deposits interfering with the steam generation mechanism.
Materials You’ll Need Before You Start
Before jumping into the cleaning process, gather these items. Having everything ready means you won’t be halfway through and suddenly searching for supplies.
- White vinegar (the hero ingredient)
- Distilled water
- A soft cloth or microfiber towel
- A small bowl or container
- Cotton swabs for tight spaces
- Baking soda (optional but helpful)
- A soft-bristled brush or old toothbrush
- Pressing cloth or old cotton fabric
Notice I didn’t mention anything abrasive like scouring pads or harsh chemicals. That’s intentional. Your Black and Decker iron’s soleplate is precision-engineered, and aggressive cleaning methods will damage it.
Method 1: The Vinegar Soak Technique
Step-by-Step Instructions
This is my go-to method because it’s gentle yet incredibly effective. Here’s exactly how to do it:
Step 1: Unplug and Cool Down
Safety first, always. Unplug your iron from the wall outlet and let it cool completely. Don’t skip this step thinking you can work on a warm iron. Trust me, burnt fingers aren’t fun.
Step 2: Prepare Your Vinegar Solution
Pour equal parts white vinegar and distilled water into your bowl. This mixture is powerful enough to dissolve mineral deposits without being too harsh. The science here is simple: vinegar’s acidity breaks down mineral buildup that regular water can’t touch.
Step 3: Soak the Soleplate
Dip your soft cloth into the vinegar solution and thoroughly dampen it. Now, place the iron face-down on this damp cloth. Leave it sitting for about 30 minutes. If you’re dealing with heavy buildup, bump it up to an hour. This soaking time lets the vinegar work its magic, dissolving those stubborn deposits.
Step 4: Wipe and Inspect
After soaking, take another clean, damp cloth and gently wipe the entire soleplate. Use circular motions and pay special attention to the steam vents. You should see gunk coming off. If it looks like there’s still residue remaining, repeat the soaking process.
Step 5: Clean the Steam Vents
Here’s where cotton swabs become your best friend. Dip them in the vinegar solution and carefully clean each steam vent hole. These tiny openings are crucial for performance, so treat them with respect. Work gently and patiently.
Step 6: Final Rinse with Distilled Water
Using a cloth dampened with only distilled water, wipe down the entire soleplate once more. This removes any vinegar residue. You don’t want vinegar smell lingering when you start ironing tomorrow.
Method 2: The Baking Soda Paste Approach
If your iron has stubborn, burnt-on spots that vinegar alone isn’t touching, baking soda can help. This method is slightly more involved but works wonders on tough buildup.
Creating Your Cleaning Paste
Mix baking soda with a small amount of distilled water until you get a consistency that resembles thick yogurt. You want it spreadable but not runny.
Application Process
Using an old toothbrush or soft-bristled brush, apply this paste directly to affected areas on the soleplate. Work in small sections with gentle, circular motions. The mild abrasive nature of baking soda removes stuck-on residue without scratching the iron’s surface.
Let the paste sit for about 15 minutes, then wipe it away with a damp cloth. Follow up with distilled water to ensure all paste is removed.
Method 3: The Self-Cleaning Feature (If Your Model Has It)
Understanding Your Iron’s Built-In Function
Many Black and Decker steam irons include a self-cleaning button or feature. If yours does, this is actually your iron trying to help you maintain it. However, relying solely on this feature isn’t enough for deep cleaning.
Using the Self-Cleaning Button Correctly
Fill your iron’s reservoir with distilled water. Set it to the highest heat setting and let it warm up completely. Hold the iron over your sink and press the self-cleaning button. Water will spray out forcefully, flushing the internal passages and vents.
Repeat this process three to four times until the water coming out runs clear. This helps dislodge loose mineral deposits from inside the iron, not just on the exterior soleplate.
Cleaning the Water Reservoir and Internal Components
Why Internal Cleaning Matters
You can have the cleanest soleplate in the world, but if minerals are building up inside the reservoir, you’re still going to have problems. The water that sits in there is what eventually becomes steam, so keeping it clean is crucial.
The Distilled Water Flush Method
Empty any remaining water from your reservoir. Fill it completely with distilled water. Turn your iron on and let it heat up. Once it reaches temperature, hold it over your sink and continuously press the steam button. Watch the water coming out—it should gradually become clearer.
Do this several times, refilling with fresh distilled water between flushes. Think of it as giving your iron an internal shower.
For Stubborn Internal Buildup
If you’ve been using tap water for a long time and your iron is struggling, fill the reservoir with that vinegar and water solution we discussed earlier. Let it sit for an hour, then flush it out repeatedly with the steam button pressed. Follow with multiple flushes of pure distilled water until the smell is gone.
Preventing Future Buildup: Smart Maintenance Tips
The Most Important Rule: Always Use Distilled Water
This single change prevents about 90 percent of iron problems. Tap water contains minerals that distilled water doesn’t. Every time you fill your iron with tap water, you’re inviting mineral deposits to settle in. Distilled water costs just a couple dollars and will save you from constant cleaning and premature iron replacement.
Empty Your Reservoir After Each Use
Don’t leave water sitting in your iron between uses. Water that sits stagnant creates the perfect environment for mineral deposits and even mold growth. It’s a simple habit that makes a massive difference.
Store Your Iron Properly
Always store your iron in an upright position on its heel rest, never on its soleplate. This prevents mineral-laden water from pooling on the bottom and ensures air circulation around the soleplate.
Establish a Cleaning Schedule
If you use your iron regularly, clean it once a month. If you use it occasionally, clean it quarterly. Mark it on your calendar if you need to. Consistency prevents problems from becoming emergencies.
Cleaning the External Body and Handle
While you’re taking care of the soleplate, don’t ignore the rest of your iron. The plastic body, handle, and cord need attention too.
Wiping Down the Exterior
Use a slightly damp microfiber cloth to wipe down the iron’s plastic body. This removes dust and any water spots. Avoid getting excessive moisture into ventilation holes or the cord inlet.
Cleaning the Cord
The power cord collects dust and grime over time. Wipe it down with your damp cloth, working from the plug end toward the iron. This prevents dust from being pushed into the connection point.
Addressing Cord Damage
While you’re cleaning, inspect the cord carefully for any cracks, fraying, or damage. If you spot anything concerning, your iron shouldn’t be used until the cord is replaced. Safety matters.
What NOT to Do When Cleaning Your Iron
Avoid Harsh Chemicals
Bleach, ammonia, and commercial oven cleaners will damage your iron’s finish and potentially corrode internal components. Stick with vinegar and baking soda—nature’s cleaning duo.
Never Use Abrasive Materials
Steel wool, scouring pads, and rough cloths will scratch the soleplate’s polished surface. Once that protective finish is gone, the soleplate is more prone to sticking and rust.
Don’t Soak the Entire Iron
Some people think dunking the whole iron in vinegar is a good idea. It’s not. Water can seep into electrical components and cause serious damage or create a safety hazard.
Skip the Aggressive Brushing
Use soft brushes only. Hard-bristled brushes intended for tough scrubbing will damage the soleplate.
Troubleshooting Common Cleaning Challenges
What If Mineral Deposits Still Remain After Cleaning?
Sometimes stubborn mineral buildup requires repeated treatments. Don’t get discouraged. Try the vinegar soak method again, but this time leave it for a full two hours. If that doesn’t work, repeat it the next day. Patience is key.
What About Those Mysterious Brown Spots?
If brown residue persists even after cleaning, you might have iron oxide accumulation. Mix equal parts vinegar and hydrogen peroxide, dip a cloth in it, and let it sit on the soleplate for 30 minutes. The hydrogen peroxide helps break down oxidized minerals.
My Iron Still Isn’t Steaming Well After Cleaning
Check that you’re using distilled water going forward. Also, make sure the steam vents are completely clear by using those cotton swabs again. If nothing works, the heating element might be failing internally, which requires professional service.
When Should You Consider Professional Servicing?
There comes a time when home cleaning isn’t enough. If your iron still doesn’t work properly after you’ve done everything in this guide, or if you see water leaking from unusual places, it’s time to contact a professional repair service.
Professional technicians have specialized equipment to clean internal components and can replace parts if necessary. Sometimes it’s worth the investment. Sometimes it signals that your iron has reached the end of its life and replacement makes more sense.
The Long-Term Benefits of Regular Iron Maintenance
Think about what happens when you maintain anything regularly versus ignoring it. Regular oil changes extend your car’s life. Regular cleaning extends your iron’s life. It’s the same principle.
When you keep your iron clean, you’re:
- Preserving steam output and performance
- Protecting your clothes from stains and damage
- Reducing the chance of breakdowns
- Getting better results with less effort
- Potentially saving money by extending your iron’s lifespan by years
That’s a solid return on investing 15 minutes of cleaning time each month.
Conclusion
Cleaning your Black and Decker steam iron isn’t complicated, but it is important. You’ve learned that mineral deposits and buildup are the enemies of performance, and that simple solutions like vinegar and distilled water are your best friends. You understand the difference between external cleaning and internal maintenance, and you know how to prevent future problems before they start.
The key takeaway is this: regular, gentle cleaning using the right materials will keep your iron working beautifully for years. Start with the vinegar soak method, establish a maintenance routine, and always—and I mean always—use distilled water. Your clothes will thank you with crisp, wrinkle-free results, and your iron will reward you with consistent, reliable performance.
Now you have zero excuses for leaving your iron neglected in the corner. Give it some love, and it will continue serving you well.
Frequently Asked Questions
Can I Use Tap Water if I Clean My Iron More Frequently?
Technically, you could, but why make extra work for yourself? Even frequent cleaning won’t completely prevent mineral accumulation from tap water. Distilled water is inexpensive and completely eliminates this problem. It’s the smarter choice that actually saves you time and effort in the long run.
How Often Should I Clean My Black and Decker Iron?
If you iron clothes regularly (several times per week), aim for monthly cleaning. If you use your iron occasionally, quarterly cleaning is sufficient. However, if you notice any performance issues, don’t wait—clean it immediately. Also, always empty the reservoir after