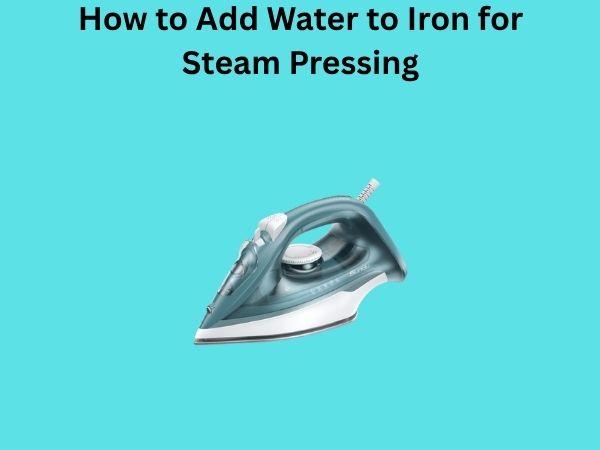
Mastering the Press: How to Add Water to Iron for Steam Pressing
Let me be honest with you—when I first got my steam iron, I had no idea what I was doing. I’d fill it with water, turn it on, and hope for the best. But that approach left me with wrinkled clothes, sputtering noises, and more than a few frustrating moments in front of the ironing board. The truth is, adding water to your iron for steam pressing is a skill, not just a random task you throw together. Once you understand the proper technique, you’ll transform your ironing experience completely.
Think of your steam iron like a car—you wouldn’t just put any liquid in the fuel tank and expect it to run smoothly, right? The same principle applies here. Your iron needs the right type of water, added at the right time, in the right way. This comprehensive guide will walk you through everything you need to know about adding water to your iron for optimal steam pressing results.
Understanding Your Steam Iron’s Water System
Before we dive into the mechanics of adding water, let’s talk about what actually happens inside your iron. Your steam iron isn’t just a fancy hot surface—it’s a sophisticated machine with a built-in water reservoir, heating elements, and steam vents. When you add water to the reservoir, it gets heated by the iron’s internal heating system and transforms into steam. This steam then travels through tiny channels and exits through perforations on the soleplate, creating that magical pressing power that removes wrinkles.
The water system in your iron consists of several key components: the water tank or reservoir where you store the water, the heating chamber where water gets converted to steam, and the steam vents that release the steam onto your clothes. Understanding these parts helps you appreciate why water quality and adding technique matter so much.
Why Water Quality Matters for Your Iron
Here’s something most people overlook: not all water is created equal when it comes to steam irons. Tap water contains minerals like calcium and magnesium, which build up inside your iron over time. This mineral accumulation, called limescale, can clog your steam vents, reduce steam output, and even damage your iron’s internal components. It’s like plaque buildup in your arteries—it slowly reduces efficiency and eventually causes problems.
Using distilled water is your best defense against mineral buildup. Distilled water has been boiled and condensed, removing most minerals in the process. If you’re in an area with extremely hard water, you might even want to consider using deionized water, which has had minerals removed through a different chemical process.
Types of Water: Making the Right Choice
Distilled Water: The Premium Option
Distilled water is the gold standard for steam irons. When water is distilled, it’s boiled and then condensed back into liquid form, leaving minerals behind. What you’re left with is essentially pure H2O. Using distilled water can extend your iron’s lifespan significantly and maintain consistent steam output throughout its life. You can find distilled water at almost any grocery store, usually in the cleaning supplies section, for just a couple of dollars per gallon.
Deionized Water: The Alternative
Deionized water, sometimes called demineralized water, is another excellent choice. This water has had its mineral ions removed through an ion-exchange process. While both distilled and deionized water work wonderfully in steam irons, some people prefer deionized water because it undergoes a slightly different purification process. The bottom line: either option will protect your iron far better than tap water.
Tap Water: Why You Should Avoid It
I understand the temptation to just use tap water from your kitchen sink. It’s convenient and free, after all. But here’s the reality: tap water will slowly destroy your iron from the inside out. Those minerals I mentioned? They accumulate in your heating chamber and steam vents. After a few months of using tap water, you might notice your steam output decreasing. After a year, you could be dealing with serious mineral deposits that are nearly impossible to remove.
Filtered Water: A Middle Ground
Some people ask about using filtered water from a pitcher or refrigerator filter. While filtered water is better than straight tap water, it’s not ideal for steam irons. Most common household filters remove some minerals but not all. For the sake of your iron’s longevity, spending a couple of dollars on distilled water is a worthwhile investment.
Preparing to Add Water: Safety First
Always Unplug Your Iron Before Adding Water
This is non-negotiable. Never, and I mean never, add water to a plugged-in iron. Even if it’s turned off, there’s always a risk of electrical hazards. Unplugging your iron ensures your safety and protects the appliance itself. It takes just five seconds to unplug, and it could prevent a serious accident.
Let Your Iron Cool Down
If you’ve just finished pressing a load of clothes, your iron will be hot—really hot. The soleplate can reach temperatures above 300 degrees Fahrenheit. Letting your iron cool for at least ten to fifteen minutes before adding water prevents burns and reduces stress on the internal heating elements. Think of it like letting a car engine cool after a long drive before servicing it.
Inspect Your Water Tank
Before adding water, take a moment to examine your water tank. Look for any discoloration, cracks, or debris inside. If you notice a white, crusty buildup, that’s limescale—a sign your iron needs descaling. We’ll talk more about that later. A quick visual inspection takes thirty seconds and could prevent problems down the line.
Step-by-Step Guide to Adding Water to Your Steam Iron
Locating Your Water Tank Opening
Different iron models have different water tank locations and openings. Some irons have a small tank built into the back of the iron, while others have larger tanks on the side. Check your iron’s manual to find the exact location and opening mechanism for your specific model. Most irons have either a flip-open cap or a removable tank compartment. Don’t guess—knowing exactly where your water opening is makes the process smooth and error-free.
Measuring the Right Amount of Water
Your iron’s manual will specify the maximum water capacity, usually measured in ounces or milliliters. There are a few reasons not to overfill your tank. First, as water heats, it expands slightly. Overfilled tanks can cause water to leak from steam vents when the iron is hot. Second, leaving some space allows water to circulate properly inside the tank. A good rule of thumb is to fill your tank about three-quarters full for most pressing sessions. For smaller touch-up jobs, you might only need half a tank.
Pouring Water Carefully
Now for the actual pouring. This seems simple, but doing it correctly prevents spills and water damage. Pour slowly and steadily—rushing leads to splashes and water all over your ironing surface. If your iron has a small opening, you might want to use a funnel to avoid spills. A simple kitchen funnel costs a dollar or two and saves you from water stains on your ironing board cover.
Closing the Tank Properly
After adding water, ensure the cap or cover is sealed tightly. A loose seal can cause water to leak out when you tip the iron during pressing. Some irons have screw-on caps; others have twist-lock mechanisms. Make sure you hear a click or feel resistance that indicates a proper seal. A few seconds ensuring proper closure prevents leaks during your pressing session.
Before You Start Pressing: Pre-Use Checklist
Letting the Iron Heat Up Properly
After adding water and plugging in your iron, don’t immediately start pressing. Your iron needs time to heat up and for water to transform into steam. Most irons take five to ten minutes to reach optimal temperature. You’ll usually hear a click or see a light turn off when the iron reaches the right temperature. Some models also have a steam-ready indicator. Patience here pays off—starting before the iron is ready results in weak steam output.
Testing Steam Output
Before pressing your good clothes, test your iron’s steam output on a scrap piece of fabric or over a sink. This accomplishes two things: it verifies your iron is working properly, and it purges any remaining air from the steam chamber. Some irons need to process water for a minute or two before steady steam emerges. This test run takes just thirty seconds and saves you from surprise weak steam on your favorite shirt.
Understanding Steam Iron Settings and Water Usage
High Heat, High Steam Settings
Different fabrics require different temperature and steam settings. Synthetic fabrics need lower heat and moderate steam, while cotton and linen tolerate higher heat and more vigorous steam. Higher steam settings use water faster, so you might need to refill more frequently when pressing heavy fabrics. Understanding these settings prevents you from running out of water mid-pressing session.
The Continuous Steam Feature
Many modern irons have a continuous steam button that lets you release steam as long as you press it. This feature uses water quickly—sometimes within five to ten minutes of continuous use. If you’re planning to use continuous steam heavily, fill your tank to capacity. Conversely, if you’re just using the steam burst feature occasionally, a three-quarter tank might be sufficient.
Maintaining Your Iron’s Water System
Regular Descaling: Preventing the Mineral Nightmare
Even when using distilled water, some mineral buildup can occur over time, especially if you occasionally use tap water or live in a very hard water area. Most iron manufacturers recommend descaling every one to three months, depending on usage. You can descale your iron using a commercial descaling solution or white vinegar diluted with distilled water.
The descaling process is straightforward: you fill the water tank with the descaling solution, heat the iron, and then express the solution through the steam vents over a sink or tub. This flushes out mineral deposits and keeps your steam vents clear. After descaling, run distilled water through the vents to rinse away any remaining descaling solution.
Cleaning the Soleplate
The bottom of your iron, called the soleplate, can collect residue from fabrics and minerals from steam. Keeping it clean ensures smooth gliding and prevents stains on your clothes. You can clean the soleplate with a damp cloth while the iron is unplugged and cool, or use a commercial soleplate cleaner. A clean soleplate makes pressing easier and more effective.
Emptying Your Tank After Each Use
Here’s a habit that extends your iron’s life significantly: empty any remaining water from the tank after each pressing session. Standing water that’s not being used can develop mineral deposits or even promote mold growth. It takes thirty seconds to empty the tank, and it’s one of the easiest preventative maintenance steps you can do.
Common Mistakes People Make When Adding Water
Overfilling the Tank
I mentioned this earlier, but it’s worth emphasizing. Overfilled tanks lead to water leaking from steam vents, water spotting your clothes, and unnecessary stress on your iron’s internal components. Fill to three-quarters capacity, and you’ll avoid ninety percent of water-related problems.
Using Tap Water Consistently
This is the biggest mistake people make. They buy an iron, use tap water for convenience, and then wonder why it stops working properly after a year. Mineral buildup is cumulative and insidious. By the time you notice a problem, significant deposits have already formed. Starting with distilled water from day one prevents this issue entirely.
Adding Water to a Hot Iron
Beyond the safety concern, adding water to a very hot iron can cause sudden temperature drops that stress the heating elements. It’s like throwing cold water on a hot stove—it creates steam suddenly and forcefully. Always let your iron cool before adding water.
Ignoring the Water Tank Opening Design
Each iron has a unique water tank design. Some have wide openings, others have narrow ones. Forcing water in at the wrong angle or speed can splash and spill. Taking thirty seconds to understand your specific iron’s water opening saves frustration and water damage to your ironing setup.
Troubleshooting Water-Related Iron Problems
Iron Producing Little or No Steam
If your iron isn’t producing steam, first check that you’ve actually added water. Obvious, but it happens. If water is present, your iron might need descaling. Mineral buildup clogs steam vents, reducing steam output to a trickle. Run the descaling solution through your iron following the manufacturer’s instructions. This usually restores steam output dramatically.
Water Leaking From the Iron
Leaks indicate either an overfilled tank, a damaged tank seal, or internal blockages. First, try emptying some water if the tank is full. If leaking continues, your tank might have a crack or the seal might be damaged, requiring professional repair or replacement.
Weak Steam Output Despite Having Water
Weak steam usually means your iron is either not hot enough yet, needs descaling, or has a blockage. Check that your iron has heated completely. If it has, try descaling. If steam is still weak after descaling, you might have a more serious internal issue requiring professional service.
Upgrading Your Iron Care Routine
Investing in Quality Distilled Water
Some people buy gallons of distilled water once a month and keep it stored for use. This is a great habit. When distilled water is readily available, you’re more likely to use it consistently. A gallon costs about two dollars and lasts most people several weeks.
Using a Water Filtration System
If you have extremely hard water and go through lots of distilled water, some people invest in small water distillers or specialized iron water filters. While these represent a bigger upfront investment, they pay for themselves quickly if you’re buying distilled water frequently.
Keeping Maintenance Records
Jot down when you descale your iron and note any issues that arise. Over time, this record helps you identify patterns and catch problems early. You might notice you need descaling more frequently during certain seasons when water usage is higher.
The Environmental Angle: Being a Responsible Consumer
Using distilled water means buying bottles or gallons of purified water, which creates some waste. If environmental concerns matter to you, consider buying distilled water in bulk (larger containers mean less packaging) or investigate whether your community has water distribution centers that offer distilled water in reusable containers. Some progressive communities are starting to offer these services.
Conclusion
Adding water to your steam iron might seem like a trivial task, but mastering this simple process unlocks the full potential of your pressing tool. The key takeaways are straightforward: use distilled water instead of tap water, fill your tank to three-quarters capacity, always unplug your iron before adding water, let it cool if it’s been in use, and descale regularly to prevent mineral buildup. These simple habits extend your iron’s lifespan, maintain consistent steam output, and protect your clothes from water spotting and damage.
Think about how often you use your iron—weekly for many people. Over several years, that’s hundreds of pressing sessions. Taking just a few extra minutes to do things properly from the start saves you hours of frustration and countless dollars in iron repairs or replacements down the line. Your iron is an investment in making your clothes look their best, and it deserves basic care and attention. Now that you understand the ins and outs of adding water to your steam iron, you’re equipped to use it properly and maintain it for years to come