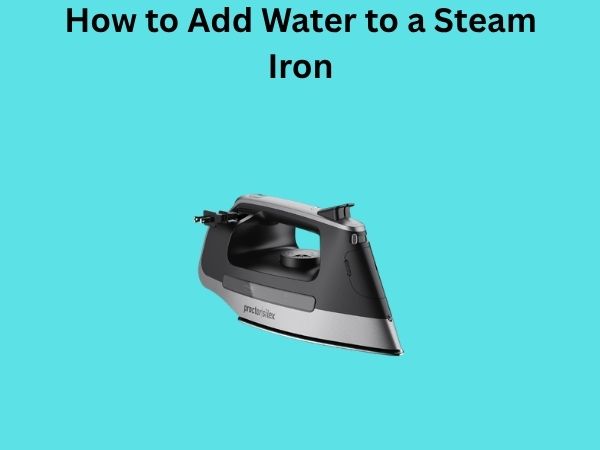
How to Add Water to a Steam Iron: A Complete Guide for Perfect Results
Have you ever stood in front of your steam iron, wondering if you’re filling it correctly? You’re definitely not alone. Most people assume that adding water to a steam iron is straightforward, but there’s actually more to it than just pouring liquid into a tank and hoping for the best. Getting this simple task right can mean the difference between wrinkled clothes and perfectly pressed garments, not to mention extending the lifespan of your iron significantly.
In this comprehensive guide, I’m going to walk you through everything you need to know about adding water to your steam iron safely and effectively. Whether you’re a seasoned ironer or just getting started with your first iron, you’ll find practical tips and important safety considerations that will help you maintain your appliance and achieve better results every single time you use it.
Understanding Your Steam Iron and Its Water Tank
Before we dive into the actual process of adding water, let’s talk about what you’re working with. Your steam iron is basically a heating device with a built-in water tank that converts liquid into steam. Think of it like a tiny kettle that’s attached to your iron. The water heats up inside the tank, turns into steam, and then shoots out through small holes in the soleplate to release wrinkles from your fabric.
The water tank itself is typically made from plastic or sometimes metal, and it has a specific capacity. Some irons hold just a cup of water, while others can hold up to two or three cups. Knowing your iron’s capacity is important because overfilling it can lead to leaks and water damage, while underfilling means you’ll run out of steam before you finish pressing your clothes.
The Different Types of Steam Iron Water Tanks
Not all water tanks are created equal. Some irons have removable tanks that you take out and fill at the sink, while others have tanks that you fill while the iron sits on the ironing board. Understanding which type you have will make the filling process much easier and safer.
Choosing the Right Type of Water for Your Steam Iron
Here’s where a lot of people go wrong, and it’s actually a crucial decision that affects how long your iron lasts. The type of water you put into your iron makes a real difference in its performance and lifespan. Let me explain why.
Why Water Type Matters More Than You Think
When you use regular tap water, you’re introducing minerals like calcium and magnesium into your iron’s heating chamber. Over time, these minerals accumulate and create a crusty buildup called limescale. This buildup can clog your iron’s steam vents, reduce steam output, and eventually damage the internal components. It’s like what happens to your kettle if you live in an area with hard water—except it’s happening inside your iron where you can’t easily clean it.
Distilled Water: The Gold Standard
Distilled water is water that has been boiled and then condensed back into liquid form, which removes most of the minerals. This is the best option for your steam iron because it dramatically reduces the risk of mineral buildup. If you care about your iron’s longevity and want it to perform optimally, distilled water is your best friend.
Tap Water: The Convenience Option
Now, I’ll be honest with you. Many people use tap water in their irons without major problems, especially if they live in areas with softer water. However, if your tap water is hard, using it regularly will shorten your iron’s lifespan. It’s a gamble, and whether you want to take it depends on your water quality and how much you use your iron.
Filtered Water: The Middle Ground
If distilled water isn’t available, filtered water from a pitcher or faucet filter is better than straight tap water. It won’t eliminate all minerals, but it will reduce them significantly. Think of it as a compromise option.
Locating the Water Fill Opening on Your Iron
This might sound obvious, but finding the water fill opening on your specific iron model isn’t always straightforward. Different manufacturers design their irons differently, and what works for one brand might not apply to another.
Common Water Fill Opening Locations
- On the top of the iron, usually marked with a water droplet symbol
- On the side of the iron, sometimes with a removable cap
- On the back of the iron near the handle
- Integrated as a transparent or translucent tank on the side
The best place to find this information is your iron’s instruction manual. I know, I know—nobody likes reading instruction manuals. But seriously, five minutes with your manual can save you from damaging your iron. If you’ve lost the manual, most manufacturers have them available online as PDF downloads.
Understanding Fill Opening Designs
Some irons have a small cap that screws off, revealing a narrow opening. Others have a hinged lid that flips open. A few modern models have a quick-fill system that makes the process incredibly easy. The design determines how carefully you need to pour the water, so understanding yours matters.
Step-by-Step Instructions for Adding Water Safely
Now we’re getting to the practical stuff. Here’s how to safely add water to your steam iron without making a mess or damaging your appliance.
Step 1: Unplug Your Iron
Before you even think about opening the water tank, make sure your iron is unplugged from the wall outlet. This is non-negotiable for safety reasons. Even if the iron has cooled down completely, you should never open the water tank while it’s plugged in. You’re dealing with electricity and heat, so taking this precaution seriously is essential.
Step 2: Let Your Iron Cool Down
If you’ve just finished ironing, give your iron at least five to ten minutes to cool. The water tank can get surprisingly hot during use, and opening it while hot can result in burns or steam escaping. Plus, adding cool water to a hot tank can sometimes cause damage to the internal components.
Step 3: Locate and Open the Water Fill Opening
Now find that fill opening we talked about earlier. Use your iron’s manual as reference if needed. Gently twist off any cap or open any lids. If there’s resistance, don’t force it—you might be turning the wrong thing.
Step 4: Prepare Your Water Container
Get your distilled water and pour some into a small container that gives you good control over the pour. A measuring cup works great because it has a spout. You want to be able to pour slowly and carefully, not dump a bunch of water at once.
Step 5: Pour Water Slowly and Deliberately
Pour your water into the opening slowly. Don’t rush this. Slow, controlled pouring prevents splashing and allows you to see exactly how much water is going in. This is especially important if you can’t see inside the tank clearly.
Step 6: Stop Before Reaching the Maximum Fill Line
Most irons have a maximum fill line either visible through a transparent section or marked on the tank itself. Stop pouring when you reach this line. Overfilling causes water to leak out during use, which can damage your ironing board or, worse, your floors.
Step 7: Securely Close the Water Tank
Once you’ve added the right amount of water, screw the cap back on tightly or close the lid securely. A loose cap will cause water to leak when you tilt the iron during use.
How Much Water Should You Actually Add?
This is one of those questions that doesn’t have a one-size-fits-all answer because different irons have different capacities. However, there are some general guidelines that work for most models.
Reading Your Iron’s Tank Capacity
Your iron’s manual will tell you the exact tank capacity in milliliters or ounces. For most household irons, this ranges from 200 to 400 milliliters, which is roughly one to one and a half cups. Your manual might also tell you how long that amount of water will provide steam—this is useful information for planning your ironing sessions.
The Fill Line Rule
If your iron has a visible fill line (which most modern ones do), that’s your target. Fill until the water reaches that line, no more, no less. This ensures you get the maximum steam output without risking overflow.
When You Can’t See the Fill Level
If you have an older iron or one without a clear indicator, you might need to estimate. A good rule of thumb is to fill until the iron feels noticeably heavier but not completely full. You want to leave a little air space at the top.
Distilled Water Versus Tap Water: Which is Better?
Let me give you the straight answer: distilled water is definitively better for your steam iron, but the difference matters more in some situations than others.
The Case for Distilled Water
Distilled water eliminates the mineral problem almost entirely. If you use distilled water exclusively, you might never have to descale your iron, and it will maintain full steam output for years. For people who use their irons frequently or who live in hard water areas, this investment pays off quickly.
The Case for Tap Water
If you live in an area with naturally soft water, or if you use your iron rarely, tap water won’t cause significant problems. Most people who use tap water just need to descale their irons periodically—maybe once or twice a year. It’s not ideal, but it’s manageable.
Making Your Decision
Consider these factors: How hard is your tap water? How often do you iron? How long do you want your iron to last? If you answered “very hard,” “several times a week,” and “as long as possible,” then distilled water is definitely worth buying. If you answered otherwise, you might be fine with tap water.
Common Mistakes People Make When Filling Their Irons
Over the years, I’ve noticed certain mistakes that come up repeatedly. Let me help you avoid them.
Mistake 1: Overfilling the Tank
This is the most common error. Water drips out, soaks into your ironing board cover, and causes rust spots on your iron’s soleplate. Don’t do it. Respect that fill line.
Mistake 2: Using Fabric Softener or Scent Solutions
Never, ever add fabric softener, scent solutions, or anything besides water to your iron’s tank. These substances will gunk up your iron’s internal mechanisms and potentially cause permanent damage. The iron itself isn’t designed to handle anything but water.
Mistake 3: Filling the Iron While It’s Still Hot
Beyond the safety risk, adding cool water to a hot tank can cause thermal stress on the internal components. This can shorten your iron’s lifespan and potentially cause cracks in the heating chamber.
Mistake 4: Not Checking Water Quality
Just assuming that any water is fine and then wondering why your iron stops producing steam within a year is a preventable tragedy. Water quality matters.
Maintaining Your Iron for Longevity
Adding water correctly is just part of proper iron maintenance. Let me share some other practices that will keep your iron working like new.
Regular Descaling Schedule
Even with distilled water, some mineral buildup can occur over time. Descaling your iron every three to six months (or more frequently if you use tap water) keeps it operating efficiently. Most irons have a descaling cycle you can run—check your manual for instructions.
Cleaning the Soleplate
A clean soleplate prevents fabric from snagging and helps your iron glide smoothly. Wipe it down with a damp cloth after each use, especially if you’ve been ironing over zippers or buttons.
Emptying Leftover Water
After your last ironing session of the day, empty any remaining water from the tank. This prevents mineral accumulation and prevents mold growth if your iron sits unused for extended periods.
Troubleshooting When Water Won’t Go In Smoothly
Sometimes you encounter resistance when trying to fill your iron. Here’s what might be happening and how to address it.
The Cap or Lid Is Stuck
If the cap won’t unscrew, try wrapping a rubber band around it for better grip. If it’s really stuck, run warm (not hot) water around it to loosen any mineral deposits, then try again. Never force it—that’s how caps break.
Water Sprays Out or Leaks Immediately
This usually means the tank is already full or the seal isn’t closing properly. Empty the tank completely and refill more carefully. If leaking continues, the seal might be damaged and you may need a replacement part.
The Fill Opening Is Too Narrow
Some irons have frustratingly small fill openings. Use a small funnel designed for narrow openings, or improvise one from a piece of paper rolled into a cone shape. This prevents spillage and makes the process less aggravating.
Safety Precautions You Absolutely Must Follow
When dealing with electrical appliances and heat, safety isn’t optional—it’s essential. Here are the non-negotiable safety rules.
Never Fill an Energized Iron
Always unplug your iron before opening the water tank. The combination of electricity and water is dangerous. Wait at least a few seconds after unplugging before opening anything.
Keep Your Hands and Face Away From the Steam Vent
When the iron is powered on and generating steam, those vents release very hot steam that can cause painful burns. Never put your hands near the steam vents or point the iron toward your face.
Use a Stable Ironing Surface
Fill your iron over a flat, stable surface like a sink or ironing board. Don’t fill it while standing or walking around. A drop from waist height can cause serious damage or injury.
Store Water Away From Children and Pets
If you keep distilled water for