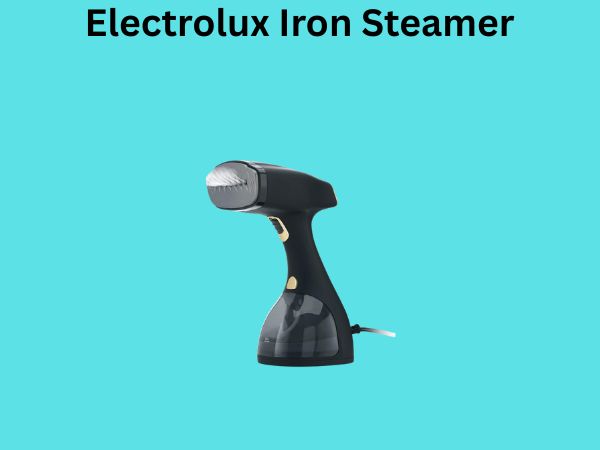
Electrolux Iron Steamer: How to Use It the Right Way
Have you ever stood in front of your closet, looking at a wrinkled shirt and wondering if there’s an easier way to get those creases out? Well, you’re not alone. Most of us dread ironing day, but what if I told you that an Electrolux iron steamer could completely transform the way you approach garment care? I’m here to walk you through everything you need to know about using this innovative device like a pro.
What Exactly Is an Electrolux Iron Steamer?
Before we dive into the how-to, let me explain what makes an Electrolux iron steamer special. Think of it as the modern cousin of your grandmother’s heavy iron. Instead of pressing heat and pressure directly onto fabric, a steamer releases hot steam that penetrates fibers, relaxing wrinkles without the aggressive contact of a traditional iron plate.
The Electrolux iron steamer combines the best of both worlds. It features both a steaming function and a flat sole plate, allowing you to tackle various garments and wrinkle intensities. Whether you’re dealing with delicate silk blouses or stubborn cotton dress pants, this device adapts to your needs.
Getting Started: Unboxing and Initial Setup
What’s Inside the Box?
When you first unbox your Electrolux iron steamer, you’ll find several components. The main unit itself is the star of the show, but there are other important pieces too. You’ll typically get an adjustable stand or hanger rack, a fabric brush attachment, a measuring cup for water, and a user manual. Take a moment to inspect each item and make sure nothing was damaged during shipping.
Setting Up Your Workspace
Now here’s where preparation meets success. You need a proper space to use your steamer. Find a flat, heat-resistant surface near an electrical outlet. If you have a standard ironing board, that works perfectly. However, if you’re using the included stand, set it up according to the instructions. Make sure you have enough space in front of you to hang garments comfortably. You don’t want to be cramped while steaming your favorite dress.
Filling and Preparing the Water Tank
Water Quality Matters More Than You Think
Here’s something many people overlook: the type of water you use directly impacts your steamer’s performance and longevity. Tap water contains minerals that can build up inside your device, reducing efficiency over time. I always recommend using distilled water whenever possible. It’s inexpensive and prevents mineral deposits from clogging the steam vents.
If distilled water isn’t available, filtered water is your next best option. Avoid mineral water or water that’s been sitting in old containers, as this can introduce unwanted particles into your steamer’s system.
The Step-by-Step Filling Process
Filling your Electrolux iron steamer is straightforward, but there’s a right way to do it. First, unplug the device from the electrical outlet. Safety first, always. Next, locate the water tank, which is usually at the rear or side of the unit. Open the tank cover and grab your measuring cup.
Pour distilled water into the measuring cup, then slowly add it to the tank. Don’t overfill it. Most tanks have a maximum fill line, and you should respect that boundary. Overfilling can cause water to leak during operation, creating puddles on your ironing board and potentially damaging your electrical outlet.
Once filled, replace the tank cover securely. Give it a gentle twist to ensure it’s tight. You’re now ready to move to the next stage.
Preheating Your Electrolux Iron Steamer
Why Preheating Is Non-Negotiable
I know it’s tempting to start steaming the moment you plug in your device, but patience is your friend here. Preheating allows the water to reach the optimal temperature for steam generation. Without proper preheating, you’ll get weak, inconsistent steam that won’t effectively remove wrinkles.
The Preheating Timeline
Plug your Electrolux iron steamer into the electrical outlet and turn it on. Most modern steamers take between two to five minutes to fully preheat, depending on the model. You’ll know it’s ready when you see a light indicator change color or hear a small beep. Some models have a ready light that glows steadily once the device reaches operating temperature.
While you’re waiting, take this time to prepare your garments. Hang them on the included stand or your ironing board, and do a quick visual inspection for stains or damage. This is also a good moment to check fabric care labels to ensure steaming is appropriate.
Preparing Your Garments for Steaming
Hang Your Clothes Properly
The way you position your garments matters significantly. Ideally, your clothes should be hung vertically using a hanger or the stand that comes with your steamer. This positioning allows steam to penetrate evenly from top to bottom. Gravity helps smooth out wrinkles, making your steamer’s job easier and more effective.
Inspect Fabric Care Labels
Before you start steaming, always check the care label. Some fabrics like delicate silks, satins, and synthetics require lower heat settings. Others, like cotton and linen, can handle full heat. The label is your guide to success. If the label says “Do not steam,” respect that instruction. Your garment will thank you.
Remove Excess Dust and Debris
Use the fabric brush attachment that comes with your steamer to gently brush your garment. This removes dust, lint, and small particles that might get embedded in the fabric during steaming. It’s a small step that makes a big difference in the final result.
Mastering the Steaming Technique
The Motion: Top to Bottom
Once your steamer is preheated and your garment is hanging, it’s time to begin. Hold the steamer nozzle about six inches away from the fabric. Start at the top of the garment and move downward using smooth, continuous motions. Think of it like you’re painting a wall—you want even coverage without skipping sections.
Don’t hold the steamer in one spot for too long. Moving it keeps the heat distributed evenly and prevents potential damage to sensitive fabrics. A gentle gliding motion, not a jabbing action, is your best friend.
Adjusting Your Technique for Different Areas
Different parts of garments need different approaches. For collars and cuffs, which tend to be thicker, use slightly slower motions and release more steam. For delicate areas like the front placket of a dress shirt, ease up on the steam intensity. Many Electrolux models have adjustable steam settings, so use them wisely.
Sleeve steaming requires a bit of finesse. Slide your hand into the sleeve to keep it open and wrinkle-free while you steam the outer surface. This prevents new wrinkles from forming while you’re eliminating old ones.
Managing Steam Release
Your Electrolux iron steamer has a trigger or button that controls steam release. Don’t hold it down continuously. Instead, use short bursts of steam, pause to let the fabric absorb the moisture, then repeat. This approach is more effective than continuous steaming and uses less water overall.
Handling Different Fabric Types
Delicate Fabrics: Silk, Chiffon, and Lace
Delicate fabrics require a gentle touch. Lower your steamer’s heat setting to the minimum or delicate setting. Keep the nozzle farther away from the fabric—about eight to ten inches. Use lighter steam bursts and avoid repetitive motion over the same area. These fabrics can be damaged by excessive heat or prolonged contact with steam.
Medium-Weight Fabrics: Cotton Blends and Polyester
Cotton blends and polyester can handle moderate heat and more frequent steam application. Use your steamer at medium heat settings and the standard six-inch distance. These fabrics are more forgiving, but that doesn’t mean you should be reckless. Still use smooth, controlled motions.
Heavy-Duty Fabrics: Linen, Wool, and Denim
Heavy fabrics benefit from your steamer’s maximum heat setting. These materials have tightly woven fibers that need more aggressive steam penetration. You can hold the steamer closer—about four to five inches away—and use longer bursts of steam. Linen especially responds well to generous steaming, as it’s highly prone to wrinkles but also forgiving with heat.
Tricky Cases: Velvet and Fur
Steaming velvet requires caution. Hold the steamer at a distance and use gentle bursts. Never press the nozzle directly against velvet, as this can flatten the pile. For faux fur or items with fuzzy textures, steam from a distance and let the garment hang undisturbed while drying.
Daily Maintenance and Care
Emptying the Water Tank
After each use, empty any remaining water from the tank. Don’t let water sit in your steamer for extended periods. Stagnant water can develop odors and bacterial growth, which can transfer to your clothes on your next steaming session. Always empty the tank within an hour of finishing.
Cleaning the Nozzle and Vents
Mineral deposits can accumulate on the nozzle over time, even with distilled water. Once a month, use a soft cloth to wipe the nozzle clean. If deposits are stubborn, soak the cloth in white vinegar and gently clean the affected areas. Never use harsh chemicals or abrasive materials, as these can damage the nozzle.
Descaling Your Steamer
Every three to six months, depending on your water quality and usage frequency, perform a descaling treatment. Mix equal parts white vinegar and distilled water. Fill the tank with this solution and run the steamer over a sink or bathtub to release the vinegar solution. This removes mineral buildup from internal components. After descaling, fill the tank with pure distilled water and run it again to rinse out any vinegar residue.
Storing Your Steamer Properly
Store your Electrolux iron steamer in a cool, dry place away from direct sunlight. Ensure it’s completely dry before storing. If you live in a humid climate, consider storing it in a cabinet or closet that won’t expose it to excessive moisture. Proper storage extends the life of your device significantly.
Troubleshooting Common Issues
Weak or No Steam Production
If your steamer isn’t producing adequate steam, first check the water level. An empty tank won’t produce steam. Next, ensure the device is fully preheated. If you’ve recently filled it, give it a few more minutes. If the problem persists, your steamer likely needs descaling. Mineral buildup blocks steam vents, reducing output significantly.
Water Leaking from the Tank
Leaking typically means you’ve overfilled the tank. Empty it completely, refill to the correct level, and ensure the tank cover is screwed on tightly. If leaking continues, the tank seal might be damaged. Check the rubber gasket inside the tank cap for cracks or deterioration.
Spots or Stains on Clothes After Steaming
This usually indicates impure water. Switch to distilled water exclusively. If you’ve already created spots, try steaming the garment again with distilled water—sometimes the new steam can help remove the mineral deposits.
Steamer Not Heating Up
Check that the power cord is properly connected and the outlet is functioning. If your steamer has a temperature dial, ensure it’s set to the desired level. If nothing works, the heating element might be faulty, and you may need professional repair or replacement.
Safety Precautions and Best Practices
Never Use When Wearing the Garment
I cannot stress this enough: never steam clothes while wearing them. Steam can cause severe burns. Always remove the garment or have someone else hold it away from your body while you steam.
Protect Your Hands and Face
Steam is extremely hot and can burn skin. Keep your hands at a safe distance from the nozzle and the garment being steamed. Be particularly careful around your face and neck. Direct steam can cause painful burns.
Ensure Proper Ventilation
Use your steamer in a well-ventilated area. The moisture released can make a room humid quickly. Open a window or turn on a fan to help moisture disperse.
Allow Garments to Cool and Dry
After steaming, let your garment hang undisturbed for a few minutes. This allows the fabric to set and the wrinkles to remain smooth as it dries. Don’t fold or move the garment immediately after steaming.
Steam Ironing Versus Traditional Ironing: Which Is Better?
The Advantages of Steaming
Steaming offers several advantages over traditional ironing. First, it’s gentler on fabrics. Without direct pressure, delicate items are less likely to get damaged. Second, it’s faster—you don’t need to wait as long for heat penetration. Third, it handles textured fabrics better. Think about ironing a pleated skirt with a traditional iron; now imagine doing it with a steamer. The steamer wins every time.
Additionally, steaming reduces shine on dark fabrics. With traditional ironing, you often get a glossy finish on dark colors. Steaming avoids this problem entirely. Finally, steaming is more versatile. You can steam hanging garments without an ironing board, making it perfect for small spaces.
When Traditional Ironing Still Wins
That said, traditional ironing has its place. If you need sharp, crisp creases—like on dress pants or structured shirts—a traditional iron with a flat plate is superior. Steaming creates softer, more relaxed results, which is wonderful for most situations but not ideal when you want precise creases.
For heavily wrinkled items or thick fabrics with stubborn wrinkles, a traditional iron might work better. The direct pressure of the plate combined with heat is more aggressive than steaming.
Pro Tips for Maximum Steaming Success
Invest in Quality Hangers
Use sturdy hangers that won’t slip or bend. Flimsy hangers can cause garments to shift while steaming,