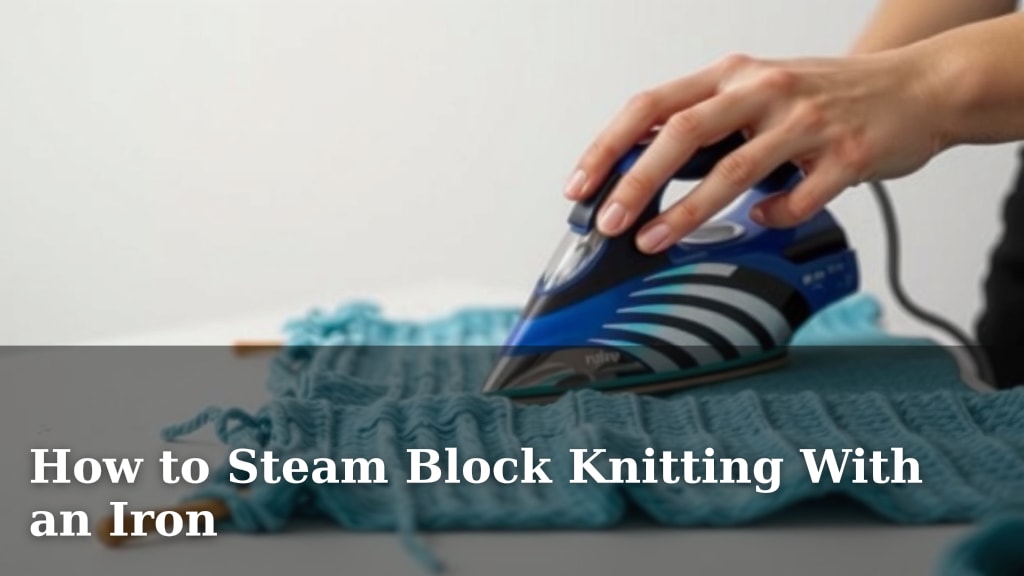
How to Steam Block Knitting With an Iron
Yes, you can absolutely steam block your knitting with a standard household iron! It’s a quick and effective way to shape your finished projects. This method works by using the steam from your iron to relax the yarn fibers, allowing you to gently mold them into your desired dimensions, making your knitted items look professionally finished.
Many knitters worry about damaging their work. However, with the right techniques, using an iron for blocking is perfectly safe for most yarn types, especially wool and acrylics. We found that it can dramatically improve the drape and appearance of sweaters, shawls, and even socks, bringing out the true beauty of your stitches and creating a smooth, even surface.
- Use steam and gentle pressure.
- Never let the iron touch the yarn directly.
- Always check your yarn’s care label first.
- Work in a well-ventilated area.
Ready to give your knitted pieces that polished look? Let’s walk through the simple steps to steam block your knitting using just your iron.
Using Your Iron to Steam Block Knitting Projects
Steam blocking is a wonderful way to shape and finish your knitted items. You can achieve a professional look right at home. This method uses steam to relax yarn fibers. This lets you gently mold your knitting into its final dimensions. It’s faster than wet blocking. It’s also very effective for many yarn types.
Gathering Your Blocking Supplies
You don’t need much special equipment. Most of what you need is probably already in your home. Having the right tools makes the process smooth. It helps you get the best results for your hard work.
Essential Tools for Steam Blocking
To get started, you’ll need a few key items. Make sure these are ready before you begin. This prevents interruptions when you’re in the zone.
- Your finished knitted project.
- A standard household iron with a steam function.
- A firm, flat surface. An ironing board or a large padded mat works well.
- Blocking mats or towels to protect your surface.
- Straight pins or blocking wires for shaping.
Preparing Your Iron and Workspace
Before you even think about steam, set up your space. Ensure good ventilation. Open a window or turn on a fan. You don’t want to breathe in too much steam. Also, make sure your iron is clean. Any residue can transfer to your yarn. That would be a knitting tragedy!
Your Step-by-Step Guide to Steam Blocking
Let’s walk through the process together. It’s easier than you might think. We’ll guide you through each part.
Step 1: Pre-Wash or Prepare Your Knitting (Optional but Recommended)
While not strictly necessary for steam blocking, a quick rinse can sometimes help. This is especially true if your yarn has sizing or oils from manufacturing. A gentle hand wash with cool water and a bit of wool wash is ideal. Squeeze out excess water gently. Do not wring or twist your knitting. Lay it flat on a clean towel and roll it up to remove more moisture. This step helps the yarn relax even before steam.
Step 2: Position Your Knitting
Lay your knitted piece flat on your prepared surface. Smooth it out gently. Ensure the fabric is lying flat and even. If you’re blocking a specific shape, like a shawl, gently ease it into those dimensions. Don’t stretch it beyond its natural limits. You want to enhance its shape, not distort it.
Step 3: Pinning for Precision
This is where you define the final shape. Use rust-proof straight pins or blocking wires. Place them along the edges. Pin the knitting to your blocking mat or surface. Space pins about 1-2 inches apart. For lace or intricate patterns, blocking wires are fantastic. They create a smooth, even edge. Ensure your pins are firmly in place. This will hold your knitting steady as you steam.
Step 4: The Steaming Process
Now for the magic of steam. Fill your iron’s water reservoir. Set your iron to the appropriate heat setting for your yarn fiber. Always check the yarn label if you can. For wool, a medium setting is usually fine. For acrylics, a slightly lower setting might be best to avoid melting. Crucially, never let the iron touch the yarn directly. Hold the iron about 1-2 inches above the fabric. Press the steam button. Move the iron slowly over the surface of your knitting. You want the steam to penetrate the fibers.
How Much Steam?
You don’t need to drench the fabric. A few passes of steam should be enough. You’ll see the knitting relax and settle into place. You can gently pat the fabric with your hand after steaming. This helps mold it further. Repeat this process across your entire project. Work in sections, ensuring each part gets adequately steamed.
Step 5: Drying Your Project
Once steamed and shaped, let your knitting dry completely. This can take several hours or even overnight. Keep it pinned in place while it dries. This ensures it holds its shape. Avoid moving it until it’s bone dry. Drying is essential for setting the shape. If you move it too soon, you might lose all your hard work.
Step 6: Remove Pins and Admire
Once completely dry, carefully remove all pins and blocking wires. Gently lift your project from the blocking surface. You should see a noticeable difference. Your knitting will lie flat. Stitches will be even. The overall shape will be perfect. It’s like magic, but it’s just science and a little bit of steam!
Choosing the Right Yarn for Steam Blocking
Not all yarns react the same way to steam. Understanding your yarn fiber is key. This ensures you don’t damage your project. Some fibers benefit more than others.
Fibers That Love Steam Blocking
Wool and wool blends are excellent candidates. They contain natural lanolin. This helps them relax and shape beautifully. Many acrylic yarns also steam block well. They can often be set into shape quite effectively. Some plant fibers, like cotton or linen, can also be steam blocked. However, they may not hold their shape as long as wool.
Fibers to Be Cautious With
Some synthetic fibers, like certain polyesters or nylons, can melt or become shiny if the iron is too hot or too close. Always test a small, inconspicuous swatch first. If you’re unsure about your yarn, err on the side of caution. It’s better to be safe than sorry.
Testing a Swatch
We recommend knitting a small swatch before blocking your entire project. Steam block the swatch according to the instructions. Let it dry completely. Check for any undesirable changes. This small step can save your project from potential damage. It gives you confidence in your technique.
Your Steam Blocking Checklist
Keep these points in mind for a smooth blocking session:
- Always check yarn care labels.
- Work in a well-ventilated area.
- Keep the iron slightly above your knitting.
- Never let the iron touch the yarn directly.
- Ensure your knitting is completely dry before removing pins.
- Test on a swatch if unsure about your yarn fiber.
Conclusion
You’ve learned that steam blocking with an iron is a fantastic way to refine your knitting projects. It’s a simple technique that makes a big difference. By using steam, you can relax fibers, shape your work, and achieve that polished look you’ve worked so hard for. Remember to always check your yarn type and keep the iron slightly above the fabric. Now you’re ready to give your finished pieces the professional touch they deserve. Your next finished object will look even better!
Frequently Asked Questions
Can I steam block any type of yarn?
While many yarns like wool and acrylic respond well to steam blocking, you should be cautious with certain synthetics. Fibers like polyester or nylon can melt or become shiny if exposed to too much heat or placed too close. We always suggest testing a small swatch first if you’re unsure about your yarn.
How close should I hold the iron to my knitting?
It’s important to keep a safe distance. Never let your iron touch the yarn directly. We found that holding the iron about 1 to 2 inches above the fabric is ideal. This allows the steam to penetrate the fibers without risking heat damage or melting.
What’s the difference between steam blocking and wet blocking?
Wet blocking involves fully soaking your knitting and then shaping and drying it. Steam blocking uses the moisture and heat from the iron’s steam to relax and shape the fibers. Steam blocking is generally much faster than wet blocking because you don’t need to wait for the item to fully dry from being saturated.
Why is ventilation important when steam blocking?
When you use the steam function on your iron, a lot of steam is released. Working in a well-ventilated area, like near an open window or with a fan running, helps prevent you from breathing in excessive amounts of steam. It makes the entire process more comfortable and safer for you.
My knitting still looks a bit wonky after steam blocking. What did I do wrong?
Ensure your knitting was completely dry before removing the pins. Drying is what sets the shape. If you removed the pins too soon, your knitting might have lost its intended form. You can also try re-pinning and steaming again, making sure to let it dry thoroughly this time.