Even Steam Iron: How to Use It Safely and Effectively
There’s something deeply satisfying about pulling a freshly pressed shirt from the ironing board, isn’t there? But let’s be honest—getting those crisp, even results without scorching your favorite blouse or creating weird shiny patches takes some skill. If you’ve recently invested in an even steam iron or you’re thinking about getting one, you’re probably wondering how to make the most of it. That’s exactly what we’re here to talk about today.
An even steam iron is a game-changer for anyone who takes pride in their clothing. Unlike traditional irons that can leave streaks or uneven pressure marks, these innovative machines distribute heat and steam uniformly across the soleplate. But here’s the thing—just having a good iron isn’t enough. You need to know how to use it properly to get those professional-looking results you’re after.
Understanding Your Even Steam Iron: What Makes It Special
Before we dive into the how-tos, let’s talk about what makes an even steam iron different. Think of it like the difference between eating at a chain restaurant versus a Michelin-starred establishment—they might both serve food, but one has clearly paid more attention to the details.
The Technology Behind Even Heat Distribution
An even steam iron uses advanced heating elements that work together to maintain consistent temperature across the entire soleplate. This means whether you’re pressing the tip or the heel of the iron, you’re getting the same amount of heat. Some models feature what’s called dual-zone heating, which independently controls temperature in different sections of the plate. Pretty cool, right?
The steam vents are also strategically positioned to ensure that moisture reaches every part of the fabric you’re pressing. This is crucial because uneven steam distribution is often what causes those annoying wet spots or areas that just don’t seem to get pressed properly.
Key Features to Familiarize Yourself With
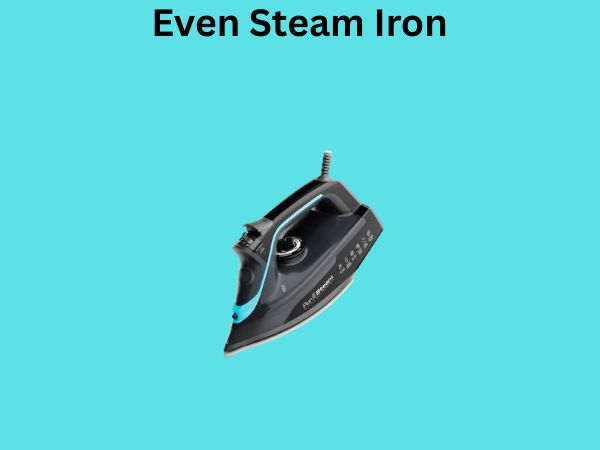
When you first unbox your even steam iron, take a moment to locate these important components:
- Water reservoir—usually located on the back or side of the iron
- Steam control dial—typically found on the handle
- Temperature settings—your key to choosing the right heat for different fabrics
- Auto-shutoff feature—a safety mechanism that kicks in after a period of inactivity
- Soleplate—the business end that actually touches your clothes
- Spray mist button—for extra moisture when you need it
Preparation: Setting Yourself Up for Success
You know the saying about how the best way to fail is to fail to plan? That definitely applies to ironing. A little preparation goes a long way toward achieving those wrinkle-free results.
Choosing the Right Ironing Board and Surface
Your ironing board is the foundation of your entire operation. If you’re using a flimsy, unstable board, even the best iron in the world won’t help you much. Invest in a sturdy board with good padding and a smooth cover. The padding acts as a cushion that helps your iron glide smoothly while also allowing heat to penetrate the fabric evenly.
Make sure your board is at a comfortable height—you shouldn’t have to bend awkwardly or reach too far. Think of it as your workspace; when it’s properly set up, everything else becomes easier and more enjoyable.
Preparing Your Clothes for Ironing
This step is often overlooked, but it’s absolutely essential. Before you even think about plugging in your iron, you need to prepare your garments properly:
- Check that clothes are clean—ironing dirty clothes just sets in the stains
- Let damp laundry air-dry slightly rather than ironing soaking wet fabric
- Turn delicate items inside out to protect the outer surface
- Unbutton collars and cuffs to ensure even pressing
- Remove any pins, hooks, or fasteners that could damage the soleplate
Filling Your Water Reservoir Correctly
Always use distilled water in your even steam iron. I know this might seem like an extra expense, but regular tap water contains minerals that build up inside your iron over time, eventually clogging the steam vents. Think of it as preventive maintenance—spend a little now to avoid bigger problems later.
Fill the reservoir only to the recommended level. Overfilling can cause water to leak from the vents and create water stains on your clothes. On the flip side, underfilling means you’ll run out of steam halfway through your pile of laundry.
Temperature Settings: Finding Your Goldilocks Zone
This is where understanding your fabrics becomes critical. Different materials respond to different temperatures, and using too much heat is one of the fastest ways to ruin clothing.
Low Temperature Settings: For Delicate Fabrics
Synthetic fibers, delicate silks, and lightweight polyester blends need to be handled with care. Your even steam iron likely has a low setting (usually marked with dots or a number system) that’s perfect for these materials.
At low temperatures, you might not generate a lot of steam, but that’s actually okay. These fabrics often need less moisture anyway. The gentle heat is enough to relax the fibers without damaging them. If you’re unsure about a garment, always start with the lowest setting and work your way up if needed.
Medium Temperature Settings: The Versatile Middle Ground
Cotton-polyester blends, dress shirts, and most everyday garments thrive at medium heat. This is often your workhorse setting, and it’s where you’ll spend most of your ironing time.
At medium temperature, you get a nice balance between effective heat for wrinkle removal and enough steam to really penetrate the fabric. This is also a safer choice when you’re unsure about a garment’s fiber content.
High Temperature Settings: Reserved for Heavy Fabrics
Pure cotton, linen, and heavier fabrics can handle high heat and are actually improved by it. Linens, for example, practically demand high heat and generous steam to look their best. The high temperature opens up the fibers and allows the steam to set your results more permanently.
Mastering the Basic Ironing Technique
Now we get to the actual ironing. This is where your even steam iron really shines, but technique still matters tremendously.
The Proper Grip and Stance
Hold your iron with a relaxed grip—you’re not wrestling an alligator here. Your hand should be comfortable and loose, allowing your arm and shoulder to do most of the work rather than gripping the handle tightly. A tense grip causes fatigue and actually interferes with the smooth gliding motion you need.
Stand to one side of your ironing board with your feet about shoulder-width apart. This position lets you use your body weight to apply gentle, consistent pressure rather than straining your arm muscles. It might feel awkward at first, but once you find your rhythm, you’ll wonder why you were contorting yourself before.
The Gliding Motion: Smooth and Controlled
The key to getting even results is maintaining a steady, smooth gliding motion. Rather than jabbing the iron down repeatedly, let the soleplate make gentle, continuous contact with the fabric as you move it along.
Think of it like painting—you wouldn’t jab your paintbrush at the canvas repeatedly, right? You’d use smooth, confident strokes. The same principle applies here. Press down gently with about the weight of the iron itself, and let that even heat distribution do its job.
Move in one direction whenever possible, working from the body of the garment toward the edges. For collars and cuffs, work from the points toward the center to avoid creating creases in the wrong places.
Managing Steam Effectively
Your even steam iron’s steam function is incredibly powerful when used correctly. Start with a moderate steam setting and increase it if needed. You want the fabric to feel warm and slightly damp, not soaking wet.
Here’s a pro tip: pull the steam trigger in short bursts rather than holding it down continuously. This gives the fabric time to absorb the moisture and actually use it to release wrinkles. If you just flood the fabric with steam, much of it just escapes into the air without benefiting your garment.
Ironing Different Garment Types
Different clothing items have their own little quirks and requirements. Let’s walk through how to handle some common ones.
Dress Shirts: The Foundation of Any Wardrobe
Start with the collar, working from the points toward the center. This prevents wrinkles from being pushed back toward the points. Next, move to the sleeves, laying them flat and pressing the underside first, then the top.
For the body of the shirt, work around the buttons rather than directly over them—your iron might damage them and definitely won’t press that area evenly anyway. Finally, tackle the front panels and back, always working from the body toward the edges.
Pants: Creating a Perfect Crease
Here’s where you really get to see your even steam iron’s advantage. Lay one leg flat on the board with the seams aligned perfectly. Press from the waistband down to the cuff, then flip and do the other side. The seams should align perfectly if you’ve positioned the pants correctly.
For the second leg, position it on top of the first (or use your second ironing board if you have one) to create a double layer. This helps maintain the crease because you’re pressing both layers together. Iron down the center of this doubled leg from waistband to cuff.
Delicate Items: Silk, Lace, and Special Fabrics
These items require a gentler approach. Always use a pressing cloth—a thin, clean piece of cotton fabric between your iron and the garment. This protects delicate materials from direct heat exposure while still allowing the pressing action to work.
Use low to medium heat, minimal steam, and let the fabric tell you when it’s done. These items don’t need aggressive pressing; just a gentle touch to release wrinkles.
Safety Considerations You Absolutely Must Know
Steam irons involve heat and electricity, so safety should always be your top priority.
Preventing Burns and Accidents
The soleplate gets incredibly hot—we’re talking hot enough to cause serious burns. Always assume it’s hot, even if you’ve only been ironing for a few minutes. Never touch the soleplate with your bare hands, and be mindful of the steam output, which can also cause burns.
When you take a break, even for a few seconds, place your iron on its heel rest where it can’t come into contact with you or your clothes unexpectedly. If you’re interrupted, turn the iron off and unplug it from the wall.
Electrical Safety
Keep your iron away from water sources unless you’re specifically filling the reservoir. Never use an iron with a damaged cord or plug, and always unplug it when not in use or when filling the water reservoir.
Use a grounded outlet if possible, and avoid using extension cords unless absolutely necessary. If you must use an extension cord, make sure it’s rated for the wattage of your iron.
The Auto-Shutoff Feature: Your Safety Net
Most even steam irons have an auto-shutoff feature that turns the heat off after 30 minutes of inactivity. Don’t rely on this as your primary safety mechanism, but do appreciate it as a backup. If you’ve been ironing for a while and find yourself distracted, your iron will turn itself off rather than sitting on your favorite silk blouse.
Maintenance: Keeping Your Iron in Top Condition
Your even steam iron is an investment, and proper maintenance ensures it lasts for years and continues performing beautifully.
Regular Cleaning of the Soleplate
Over time, residue can build up on the soleplate. Every few weeks, let your iron cool completely, then wipe the soleplate with a damp cloth. For stubborn buildup, use a cloth with a tiny bit of vinegar on it.
Never use abrasive scrubbers or harsh chemicals, as these can scratch the soleplate and affect its performance. Keep those steam vents clear by occasionally running distilled water through the steam function over a sink or bucket.
Descaling: The Maintenance Must-Do
Even though you’re using distilled water, some mineral buildup is inevitable. Most even steam irons have a descaling function or recommend using a descaling solution monthly. Check your instruction manual for the specific process for your model.
Regular descaling prevents that nasty brown water from shooting out of the vents onto your clothes—a discovery that’s never pleasant when you’re halfway through ironing day.
Proper Storage
Always let your iron cool completely before storing it. Empty the water reservoir to prevent mineral buildup and mold growth. Store it upright on its heel rest to prevent damage to the cord and soleplate.
Keep it in a clean, dry place away from moisture and dust. A dedicated shelf or cabinet is ideal. Avoid storing it wrapped in the cord because this can eventually damage the electrical connections.
Troubleshooting Common Issues
Even with proper technique and maintenance, occasionally something goes wrong. Here’s how to handle the most common problems.
Uneven Heating Despite Your Even Steam Iron
If you’re noticing that some areas heat up more than others, check the temperature dial and make sure it’s fully set to your desired level. Some irons have a light that indicates when the iron has reached temperature—wait for that light to turn off before starting.
Descale your iron if you haven’t recently, as mineral buildup can interfere with heating elements. If the problem persists, there might be an issue with the internal heating mechanism, and you should contact the manufacturer.
Weak or No Steam Output
First, make sure your reservoir actually has water in it. Sounds obvious, but it happens. If you do have water, check that the steam dial is actually turned on—sometimes it’s set to “no steam” by default.
If steam still isn’t happening, your steam vents might be clogged. Run the descaling cycle or use the manual steam-clean function if your model has one. If you’ve never descaled before, this is definitely overdue.
Water Leaking from the Vents
This usually means you’ve overfilled the reservoir. Empty it down to the proper level. Also check that you’re not using the spray mist function too excessively while also using steam, as this can overwhelm the system.
If leaking continues even with a properly filled reservoir, there might be an internal issue with the valve system, and you should have it serviced.
Pro Tips for Perfect Results Every Time
Now that you understand the basics, here are some insider tricks that will elevate your ironing game.
The Sprinkle Method for Extra Stubborn Wrinkles
For wrinkles that just won’t cooperate, lightly mist the area with a water bottle before ironing. Let it sit for a minute to allow the moisture to penetrate, then iron as normal. The pre-moistening really helps that steam work more effectively.
Work in Batches and Stay Organized
Rather than grabbing random items, organize your clothes by temperature requirement