Hamilton Beach Iron Steamer: How to Use It Properly
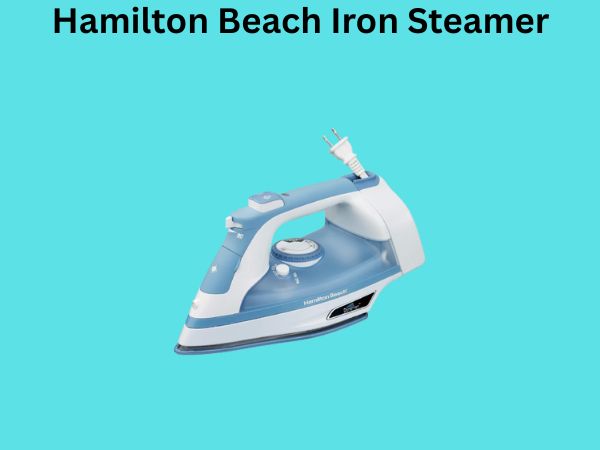
Let me be honest with you—wrinkled clothes can really take a hit on your confidence. Whether you’re preparing for an important meeting, a special date, or just want to look put-together on a regular Tuesday, having a reliable steamer in your corner makes all the difference. That’s where the Hamilton Beach Iron Steamer comes into play. This versatile device combines the functionality of a traditional iron with the gentleness of a steamer, giving you the best of both worlds.
If you’ve recently purchased one of these nifty gadgets or you’re thinking about it, you might be wondering how to get the most out of it. In this comprehensive guide, I’ll walk you through everything you need to know about using your Hamilton Beach Iron Steamer like a pro.
Understanding Your Hamilton Beach Iron Steamer
Before we dive into the nitty-gritty of operation, let’s talk about what makes this device special. The Hamilton Beach Iron Steamer isn’t your average household appliance. It’s designed to tackle everything from delicate silks to sturdy cottons with equal finesse. Think of it as the Swiss Army knife of fabric care—compact, efficient, and incredibly versatile.
What Exactly Is an Iron Steamer?
An iron steamer is basically a hybrid device that functions as both a traditional pressing iron and a vertical steamer. Instead of relying solely on direct heat and pressure like a conventional iron, it uses steam to relax fabric fibers and release wrinkles. This approach is gentler on your clothes while still delivering impressive results.
The Hamilton Beach version takes this concept and refines it, incorporating features that make your ironing and steaming experience smoother and more efficient. You get the precision of an iron when you need it and the convenience of a steamer when you want to work faster.
Key Features You Should Know About
Your Hamilton Beach Iron Steamer comes equipped with several important features that you’ll want to understand:
- A water reservoir that holds enough liquid for extended steaming sessions
- Variable heat and steam settings to accommodate different fabric types
- A soleplate designed for both pressing and steaming
- Automatic shut-off functionality for safety
- A cord that provides flexibility without restricting your movement
Getting Started: Initial Setup and Preparation
So you’ve just unboxed your new Hamilton Beach Iron Steamer. What’s next? Don’t just plug it in and start using it right away. Taking a few minutes to prepare properly will ensure optimal performance and longevity.
Filling the Water Reservoir
The water you use matters more than you might think. Here’s what I recommend:
- Always use distilled water to prevent mineral buildup inside the reservoir
- Fill the reservoir to the indicated maximum line—not beyond
- If you use tap water repeatedly, you’ll eventually see mineral deposits that can affect performance
- For the best results, change the water between steaming sessions if possible
If your device already has mineral buildup, don’t worry. Most Hamilton Beach models include a descaling solution or you can use white vinegar mixed with water to clean the internal components. Simply fill the reservoir with this mixture, run it through the heating cycle, and dispense some through the soleplate before doing a final flush with distilled water.
Checking the Soleplate and Power Cord
Before your first use, inspect the soleplate carefully. It should be clean and smooth without any scratches or debris. If you notice any residue, wipe it gently with a damp cloth and allow it to dry completely. Also, check that your power cord isn’t damaged and that it reaches the area where you’ll be working.
Understanding Heat and Steam Settings
Here’s where many people go wrong with their steamers. They assume one setting works for everything, which couldn’t be further from the truth. Your Hamilton Beach Iron Steamer offers multiple heat levels, and using the right one for your fabric makes an enormous difference.
Temperature Guide for Different Fabrics
Let me break down the ideal settings for common materials:
- Delicate Fabrics (Silk, Lace, Satin): Use the lowest heat setting with moderate steam. These materials are sensitive and can be damaged by excessive heat.
- Medium Fabrics (Cotton Blends, Polyester, Lightweight Wool): Medium heat with medium to high steam works beautifully here. You get great wrinkle removal without risk.
- Heavy Fabrics (Denim, Canvas, Heavy Linen): Maximum heat with high steam setting will tackle stubborn wrinkles effectively.
- Synthetics (Acrylic, Nylon, Spandex): Keep heat lower since these can melt or warp under excessive temperature.
Always check your garment’s care label first. That little tag exists for a reason, and it’ll tell you exactly what temperature range is safe.
Finding Your Sweet Spot
Here’s a pro tip: start with a lower heat setting and gradually increase it if needed. It’s much easier to add more heat than to repair a garment that’s been damaged by too much. I usually give the device two to three minutes after turning it on to fully heat up before I start steaming or ironing.
Mastering the Steaming Technique
Now we’re getting to the good stuff. Once your device is ready, how do you actually use it for steaming? The technique matters more than you’d expect.
Vertical Steaming for Hanging Garments
One of the greatest advantages of the Hamilton Beach Iron Steamer is its ability to steam clothes while they’re hanging. This is perfect for delicate pieces, dresses, suits, and anything you want to handle gently.
To steam vertically, hang your garment on a hanger or over a chair. Hold the steamer a few inches away from the fabric—not touching directly. Move it slowly downward in smooth, deliberate strokes. Let the steam do the work rather than trying to force the wrinkles out.
Here’s something important: always work from the top of the garment downward. This way, any moisture drips down toward the hem rather than spreading onto already-steamed portions. For best results, make two passes over each section, especially heavily wrinkled areas.
Using the Iron Function
When you switch to traditional ironing mode, your technique changes. Place your garment on an ironing board and set up your Hamilton Beach Iron Steamer as you would a regular iron. Here’s where you apply gentle pressure while moving the soleplate across the fabric.
Follow these steps for best results:
- Begin with the least wrinkled parts of the garment first
- Work in the direction of the grain whenever possible
- Use smooth, overlapping strokes rather than jerky movements
- For collars and cuffs, iron from the tip toward the seam to prevent puckering
- Always lift the soleplate when changing direction rather than dragging it across
The combination of steam and light pressure from the soleplate will smooth out wrinkles more effectively than either method alone.
Special Techniques for Different Garment Types
Let me share some specific strategies I’ve discovered for getting professional results with various clothing items.
Steaming Dress Shirts and Blouses
For dress shirts, I recommend starting with the collar. Unbutton everything and steam the collar from the underside first, then flip and do the top side. This prevents the edges from curling up. Move on to the sleeves, working from shoulder to cuff. Save the front and back panels for last since they’re typically the largest and most visible areas.
Handling Pants and Skirts
For pants, hang them on a hanger by the cuffs and steam the insides of the legs first. This gives the fabric time to relax. Then flip them over and do the outside. For the waistband, be gentle to avoid creating shine marks. Skirts should be steamed in sections, rotating them on the hanger as you go.
Working with Delicate Pieces
Silk, lace, and other delicate fabrics require a lighter touch. Use the lowest heat setting and hold the steamer further away from the fabric—about six inches instead of three. You might need more passes, but your delicate garments will thank you for the gentleness.
Tackling Stubborn Creases
For those really stubborn wrinkles that won’t budge? Try this: hold the steamer steady in one spot and let the steam penetrate for several seconds. Then slowly move it. For the toughest creases, you might even alternate between steaming and light pressing with the soleplate, giving the fabric multiple opportunities to relax.
Maintenance and Care of Your Device
Like any appliance, your Hamilton Beach Iron Steamer performs best when properly maintained. Think of maintenance as an investment in longevity and consistent performance.
Regular Cleaning Schedule
After every few uses, wipe down the soleplate with a soft, damp cloth when the device is unplugged and cool. This prevents fabric lint and residue from building up. Once a month, I recommend running the descaling solution through the system if you live in an area with hard water.
Addressing Mineral Deposits
If you notice that steam output has decreased or you see white crusty deposits around the steam vents, descaling is definitely needed. Fill the reservoir with equal parts white vinegar and distilled water, heat the device, and dispense this mixture through both the steamer and iron functions for about a minute. Then refill with plain distilled water and repeat to flush out any vinegar residue.
Checking the Water Level
Always check that you have enough water before starting. Running the device dry can damage the heating element and reduce its lifespan significantly. I make it a habit to check before every steaming session.
Safety Considerations You Can’t Ignore
Safety should always come first when using any heated appliance. Your Hamilton Beach Iron Steamer gets quite hot, and the steam it produces can cause burns if you’re not careful.
Protecting Yourself
- Always allow the device to cool completely before storing it
- Keep the soleplate and steam vents away from your hands while in use
- Never touch the fabric immediately after steaming since it retains heat
- Be cautious of steam burns, which can be quite painful
- Keep the device away from children and pets
Using the Auto Shut-Off Feature
Your Hamilton Beach Iron Steamer includes an automatic shut-off function. This safety feature activates after a period of inactivity, preventing the device from overheating. Don’t disable this feature—it’s there to protect both you and your appliance.
Troubleshooting Common Issues
Even with proper use, you might encounter some issues. Let me address the most common ones I’ve seen people deal with.
Weak Steam Output
If your steamer isn’t producing strong steam, mineral buildup is likely the culprit. Descaling should solve this problem. Make sure you’re also allowing adequate heating time before using the device.
Water Leaking from the Soleplate
This usually happens when you fill the reservoir too full or when the device isn’t level. Always fill to the indicated line and ensure your ironing board or work surface is stable and level.
Device Not Heating Up
Make sure you’ve pressed the power button and that the outlet is functioning properly. If the device still won’t heat after several minutes, there might be an internal issue requiring professional service.
Shine Marks on Dark Fabrics
This occurs when you apply too much pressure or heat. Use lower heat settings and apply minimal pressure when ironing dark materials. Alternatively, use the steaming function exclusively for delicate dark garments.
Pro Tips and Tricks I’ve Learned
After extensive use, I’ve picked up some excellent strategies that really maximize the Hamilton Beach Iron Steamer’s potential.
The Pre-Steam Mist
Before steaming heavily wrinkled garments, try misting them lightly with plain water from a spray bottle. This preps the fabric and allows the steam to work more effectively. Just don’t oversaturate—you want damp, not soaking wet.
Organizing Your Steaming Session
Work efficiently by steaming all garments of the same type at once. Do all your shirts first, then your pants, then your delicate pieces. This prevents you from constantly adjusting heat settings and saves time overall.
Storing Your Device Properly
Empty the water reservoir before storing your device for extended periods. Water sitting in the reservoir can develop mineral deposits or even mold. Store it upright in a cool, dry place where it won’t get knocked over.
Comparing Methods: Steaming vs. Traditional Ironing
You might wonder when to use steaming versus traditional ironing. The answer depends on your garment and what you’re trying to achieve.
Steaming is gentler and better for delicate fabrics, knitwear, and structured garments like blazers. It’s faster for quick touch-ups and works great on hanging clothes. Traditional ironing gives you more control and precision, making it ideal for crisp creases, collars, and cuffs. Your Hamilton Beach Iron Steamer lets you do both, giving you maximum flexibility.
Conclusion
The Hamilton Beach Iron Steamer is truly a game-changer for anyone serious about keeping their clothes looking sharp and well-maintained. By understanding how to properly fill the water reservoir, select appropriate heat settings, master both steaming and ironing techniques, and maintain your device, you’ll get years of reliable service and consistently impressive results.
Remember that this device works best when you take the time to use it correctly. Start with lower heat settings, always use distilled water, and adjust your technique based on the fabric you’re working with. Whether you’re steaming a delicate silk blouse or pressing crisp dress pants, your Hamilton Beach Iron Steamer is up to the task.
The investment you make in learning to use this device properly will pay dividends in how your clothes look and how long they last. No more dreading wrinkled garments or worrying about damaging delicate fabrics. With the techniques and tips I’ve shared, you’re now equipped to become a steaming and ironing expert.
Frequently Asked Questions
What type of water should I use in my Hamilton Beach Iron Steamer?
Distilled water is always your best choice. Tap water contains minerals that accumulate inside the reservoir and heating element over time, reducing efficiency and potentially causing permanent damage. If you absolutely must use tap water occasionally, follow up with regular descaling using white vinegar and water solution. Distilled water