How to Steam Iron Curtains: Easy Guide
Yes, you absolutely can steam iron curtains to make them look fresh and crisp! It’s a surprisingly easy process that will refresh your room. You just need a steam iron and a little patience.
Wrinkled curtains can make a whole room feel a bit dingy. Steam ironing is a fantastic way to remove stubborn creases and give your drapes a polished, brand-new look without the need for professional cleaning. It’s a simple DIY task that makes a big difference.
- Steam iron curtains to remove wrinkles.
- Hang curtains securely before steaming.
- Use the right iron setting for your fabric.
- Keep the iron moving to avoid damage.
- Allow curtains to dry completely.
Ready to transform your space? Let’s walk through exactly how to steam iron your curtains step by step to get them looking their best.
“`htmlYour Step-by-Step Guide to Steaming Curtains
Got curtains that look a little sad and wrinkly? You’re in the right place! We’ll show you how to steam iron them so they hang beautifully. It’s much simpler than you might think, and the results are truly satisfying. Let’s get those drapes looking fabulous!
Gathering Your Steaming Supplies
Before you start, make sure you have everything you need. This makes the process go much smoother. You don’t want to stop halfway to find something!
Essential Tools for the Job
The main star is, of course, your steam iron. Make sure it’s clean and free of any mineral buildup. A clean iron prevents stains. You’ll also need a sturdy, heat-resistant surface or a way to hang your curtains securely. A spray bottle filled with water can be handy too, for those extra stubborn spots.
Checking Your Curtain Fabric
This is super important! Not all fabrics react well to heat. Always check the care label on your curtains. Most modern curtains are made of synthetic blends, cotton, or linen, which generally do fine with steam. Delicate fabrics like silk or velvet might need special treatment or a professional cleaning. If you’re unsure, test a small, hidden area first.
- Read the care label.
- Identify the fabric type.
- Test on an inconspicuous spot if unsure.
Preparing Your Curtains for Steaming
Proper preparation prevents mishaps and ensures the best results. Think of this as setting the stage for success.
Hanging Your Curtains Securely
This is the most critical step for safe and effective steaming. You need your curtains to hang straight and taut. This allows the steam to work evenly and prevents the fabric from bunching up. If you’re steaming them while they’re still hung on the rod, make sure the rod is secure and can handle the weight.
Steaming While Hung
If you choose to steam them while they are hanging, ensure they are pulled taut. You might need a second person to help hold the bottom straight. Be mindful of any nearby walls or furniture. You don’t want to accidentally steam them!
Steaming Them Down
Some find it easier to take the curtains down and hang them on a sturdy line or a drying rack. This gives you more control. You can pull the fabric straight with one hand while guiding the iron with the other. Just ensure they are hung securely and won’t fall.
Setting Up Your Steam Iron
Now for the iron itself. You want the right temperature and steam level for your fabric. Consult that care label again!
Choosing the Right Heat Setting
Manufacturers often recommend specific heat settings. For most common curtain fabrics, a medium heat setting is a good starting point. Synthetics often require lower heat than natural fibers like cotton or linen. If you’re unsure, start low and gradually increase the heat as needed.
Adjusting the Steam Output
You want enough steam to relax the fibers, but not so much that it makes the fabric overly wet. Many irons have adjustable steam settings. A medium steam output is usually sufficient. Too much steam can leave water spots, especially on darker fabrics.
The Steaming Process: Technique and Tips
You’re almost there! Now it’s time to actually steam. Remember, patience is key here.
Holding the Iron Correctly
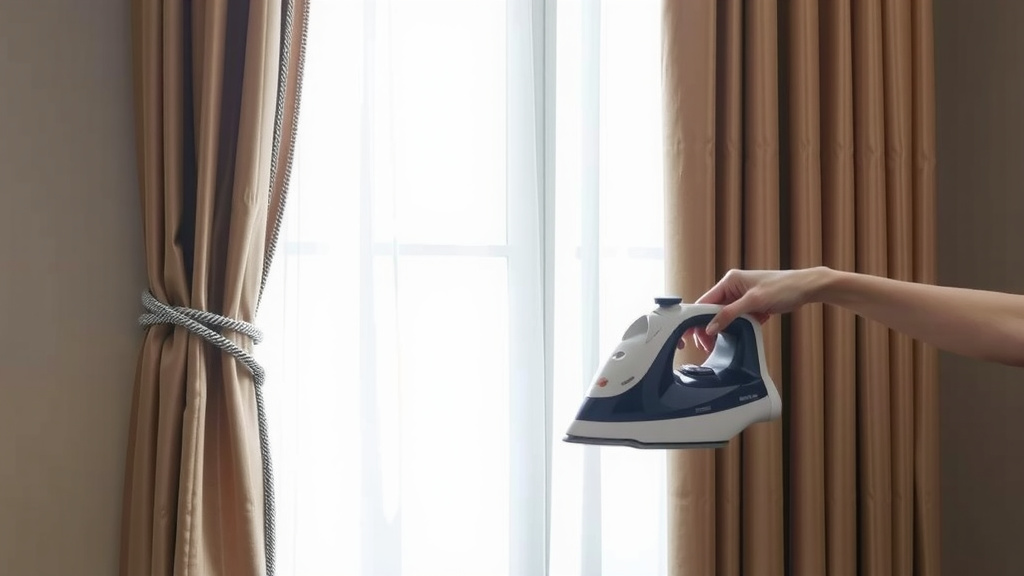
Keep the iron slightly away from the fabric. Never press the iron directly onto the material. The steam needs space to work its magic. Imagine you’re tickling the wrinkles away, not ironing them out.
Moving with the Grain
Always move the iron in an up-and-down motion, following the direction of the fabric’s weave or nap. Avoid circular motions, which can stretch or distort the material. Keep the iron moving constantly to prevent overheating any one spot.
Dealing with Stubborn Creases
For those really tough wrinkles, you might need a little extra help. Hold the iron a bit closer (but still not touching!) and let the steam penetrate for a few extra seconds. Some people find lightly misting the area with water from a spray bottle beforehand can also help.
What to Avoid During Steaming
We’ve covered what to do, but what about what *not* to do? Avoiding common mistakes will save your curtains.
Don’t Let the Iron Touch
We can’t stress this enough. Direct contact between a hot iron and your curtains can cause melting, scorching, or permanent marks. Always maintain a safe distance. Think of it as a gentle steam bath for your curtains.
Avoid Over-Steaming
Drenching your curtains isn’t necessary and can lead to long drying times and potential water spots. You want to relax the fibers with steam, not soak them. If you see water dripping heavily, you’re using too much steam or holding the iron too close.
Check for Colorfastness
If you’re steaming brightly colored or dark curtains, test a small, hidden area first to ensure the steam and heat don’t cause any color bleeding or fading. Many fabric dyes are colorfast, but it’s always wise to check.
Drying and Finishing Touches
Once you’ve finished steaming, there are a couple of important final steps to ensure your curtains look their absolute best.
Allowing Ample Drying Time
This is non-negotiable! Your curtains need to be completely dry before you leave them hanging. If they are still damp, they can attract dust more easily and may develop new wrinkles. Proper drying ensures the steamed-out creases stay gone.
Final Inspection
Once dry, step back and admire your work! Look for any missed spots or areas that might need a quick touch-up. You’ve worked hard, so give yourself a pat on the back.
Here’s a quick checklist to keep handy:
- Read the fabric care label.
- Hang curtains securely and taut.
- Use the correct iron heat and steam settings.
- Keep the iron moving, slightly away from fabric.
- Allow curtains to dry completely.
Conclusion
You’ve now learned how to transform your curtains from wrinkled and worn to beautifully smooth and fresh. Steaming them is a simple DIY project that makes a huge impact on your room’s appearance. Remember to always check your fabric’s care label, hang them securely, and maintain the correct distance with your iron. By following these steps, you’ll achieve professional-looking results right in your own home. So go ahead, give your curtains the spa treatment they deserve, and enjoy the refreshed look of your space!
Frequently Asked Questions
Can I steam iron any type of curtain fabric?
Generally, yes, but always check the care label first. Fabrics like cotton, linen, and many synthetic blends are suitable for steaming. However, very delicate materials like silk, velvet, or certain embellished fabrics might require special handling or professional cleaning to avoid damage. It’s always best to test on an inconspicuous spot if you’re unsure.
How do I prevent water spots on my curtains when steaming?
Water spots often happen when the iron is too close or set too high, causing excess water to drip. Ensure your steam iron is clean and free of mineral buildup. Use a medium steam setting and keep the iron slightly away from the fabric. If you notice water dripping, reduce the steam or increase the distance.
What’s the best way to hang curtains for steaming?
The most effective method is to hang them securely so they are taut and straight. You can steam them while they’re still on the rod, pulling the fabric down to keep it straight. Alternatively, taking them down and hanging them on a sturdy line or drying rack gives you more control and easy access to all areas.
How close should the steam iron be to the fabric?
You should never let the steam iron directly touch your curtains. Hold the iron about an inch or two away from the fabric. This distance allows the steam to penetrate and relax the fibers without the risk of scorching, melting, or causing permanent marks on the material.
How long do curtains need to dry after steaming?
Curtains should be completely dry before you leave them hanging. This typically takes anywhere from 30 minutes to a couple of hours, depending on the fabric thickness and humidity in your home. Ensure they are fully dry to prevent new wrinkles from forming and to avoid attracting dust.